Testing Pre-Order Menus
Once you’ve created your menu, we strongly recommend testing it before making it live to customers. This ensures your configuration is correct and that everything displays as expected. We’ve provided a series of suggested steps to guide you through testing the process as an operator, so you can confirm it works smoothly before opening pre-orders to your customers.
Testing Pre-Order Menu Topics
Pre-Requisites
For the purpose of testing, we will need to assume that you have completed the menu build both within iOrder and Events. This would entail:
-
Building your menu in iOrder - (Ensuring that no errors show in the preview menu section on iOrder)
-
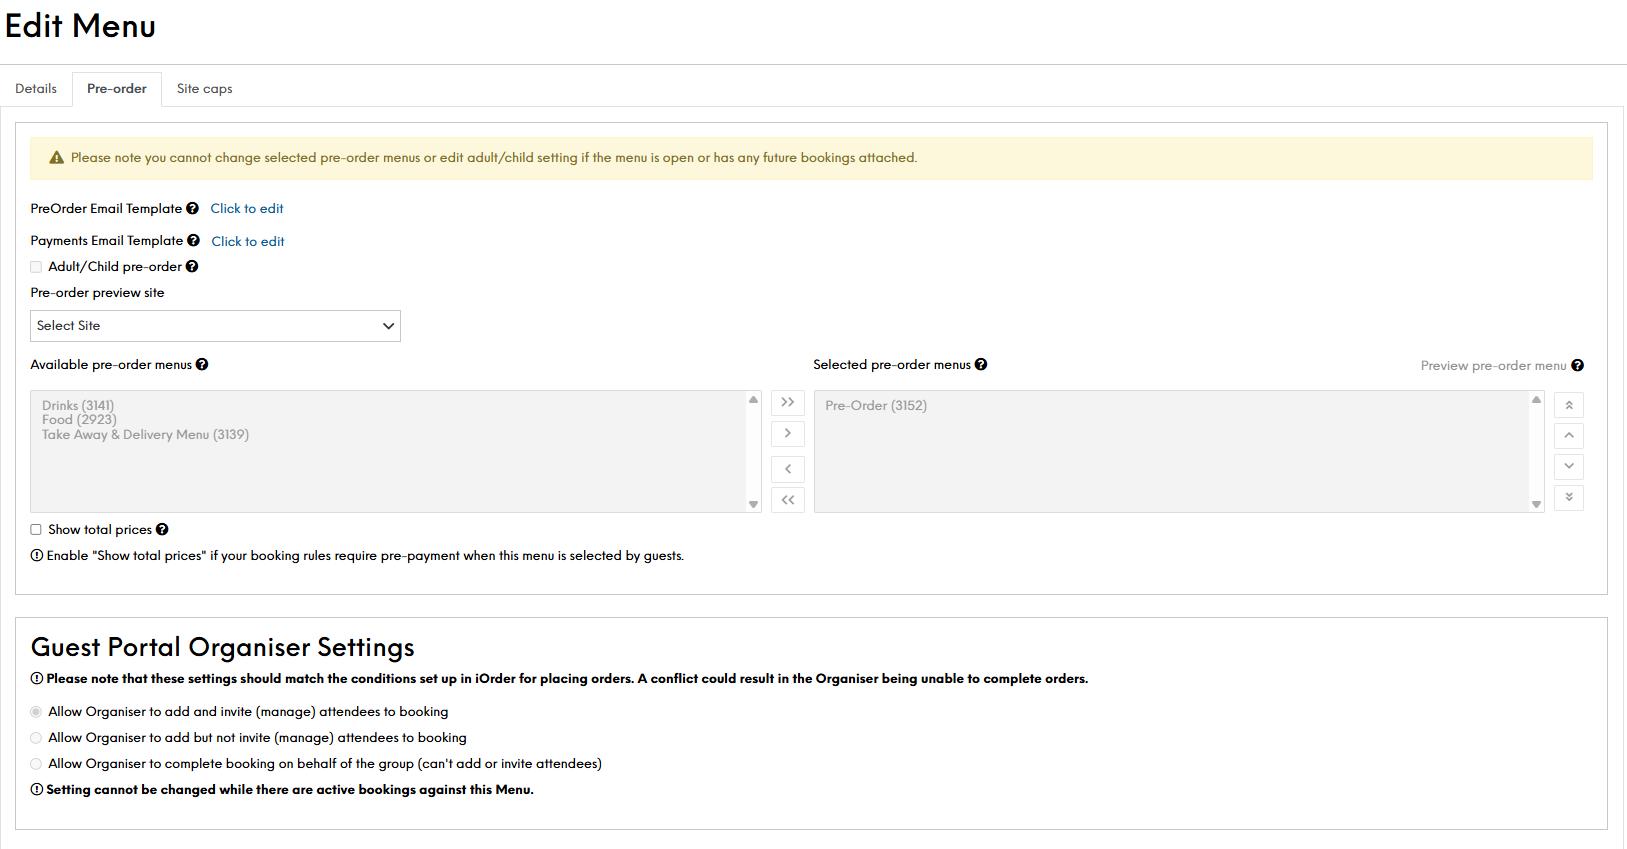
Building your menu in Events - (Previewing the selected pre-order menu in Events)
Creating a Test Menu
For pre-orders, we always recommend testing before making them live for your customers. To help with this, we’ve outlined some proven steps to ensure everything is set up correctly and functioning as expected.
-
Select Copy from the Actions column
-
Re-name the menu Internal Name
-
Re-name the menu Display Name
Entering something clear such as "Test X Menu".This way it ensures both your team are aware and it's clearly used for testing. Also if any channels are left open, your guests can see it worded to be a test also. - Select the Site you will be using to test this with
-
Select the relevant Channels
At this stage we recommend ONLY selecting Events Host App. This will allow you to test without making the menu visible or open for selection via your website and to your guests.
-
Click Save Changes
The menu will show as being closed for pre-order. Either select to Open Pre-Orders OR keep the menu in this state until you have made a test booking. As part of this test, you will be able to review your email templates that your guests will receive. -
Continue below to Making a Test Booking
Making a Test Booking
Only once your test menu is ready, you can now make a test booking.
-
Click to Create a New Booking
-
Select the Occasion
-
Select the number of Covers
-
Select tomorrow as the date
-
Select the Time
-
Select the Menu
-
Click Continue
-
Enter Customer Details
-
Click Save as Confirmed
If you kept the menu closed for pre-order, you now can select in the Admin section, to "Open Pre-Orders". This will trigger an email notification to the guest that the pre-order window has now opened. Review your template to ensure it is worded correctly, you can review more about email configurations under the Emails topics -
Re-enter the Booking Details
-
Click Go to Guest Portal
You will enter the guest portal as the Host. As the Host you have a much longer window to create, edit and/ or update a re-order. For the next steps, they may vary slightly based on your pre-orders Guest Portal Organiser settings. The below process allows the organiser to add and invite (manage) attendees to booking.
-
Click Add Attendee - add surnames to your test guests.
-
Select an attendee.
-
Click Choose My Meal.
Review the menu displayed. Check your courses are correctly outlined and products are worded correctlyZonal Recommends: As part of any testing, select items from each course, along with product that have choices e.g., Steak with it's cooking temperature, or a Dessert with the option of custard or cream -
Click Complete Order
-
Repeat for each attendee
-
Return to the Event Overview
On the Events overview, you will now see a list of all attendees, with a green symbol of a knife and fork. This shows that your attendees have completed their pre-orders, and successfully saved.
If you are not seeing this, or have encountered any errors up to this point, please refer to the Pre-Order Errors troubleshooting topic.
Pre-Order on the POS
Once a pre-order reaches the POS, they are stored on the till as delayed orders.
To view the orders:
-
Navigate to “Pick up Account”.
-
Tap on “Delayed Orders”.
-
Tap the name of your test booking.
A message will display: “The order preparation has not been started. Request this now?” -
Tap"No" here.
If you select Yes, you'll need to quickly tell your team to stop preparing this order, as this will send the order through to the kitchen, but it won't have a table number. After selecting no, the ticket will show.
You'll also now have the ability to make changes to the order. Voiding products or adding products and confirming the order. -
Select “Tables” - to display your table plan.
-
Tap the required table number.
You will be asked: “Are you sure you want to move Account Number X to Table XX”
-
Select "All Items".
If the order / ticket is in an orange state (i.e., the font/text is orange), it's because the order is in a Hold state. Many of the other button options will show as greyed out. This will prevent the order sending to the printer. You will need to select the “Hold Delayed Order” button to then release the order (it'll revert to white text) and this once saved will send to the relevant printers.
-
Tap Save to send the account
Now go to the relevant printers and check the order in how it prints