Rate Plans
Overview
You can set up multiple rate plans in the PMS for flexibility and customisation catering to different Guest preferences.
You need to have at least one rate plan attached to a room for it to be visible in your availability page.
You can also set up hidden rates for exclusive use on your OTAs.
Rate Plans can be:
- Hidden from your Guests
- Derived from other rate plans
- Discounted for all Occupancy levels in the room
To access your rate plans hover over Grid and select Rate Plans.
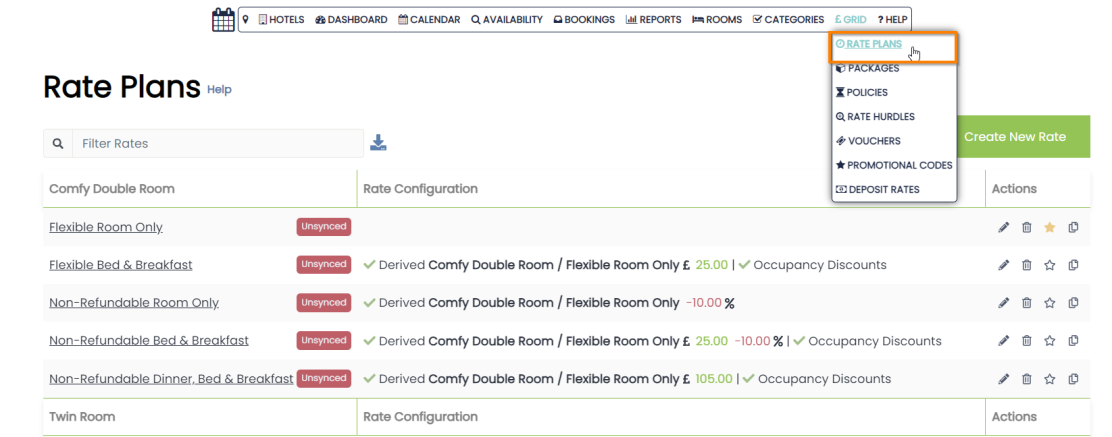
Rate Plans hold the following data:
- Rate (daily cost)
- Stop Sell On/Off
- Minimum and Maximum Stay values
- Closed to Arrival On/Off
- Closed to Departure On/Off
Creating Rate Plans
To Create a New Rate click Create New Rate on the rate Plans page.
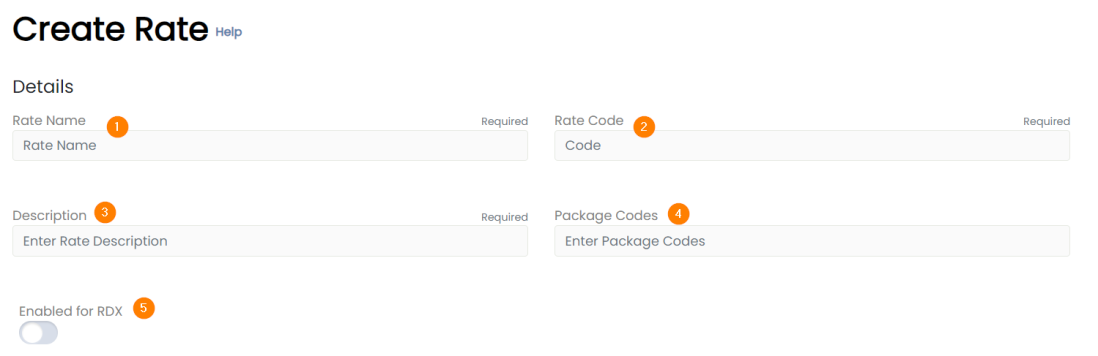
Enter Details for the Rate Plan:
-
Rate name is how the plan will be identified within the system internally and shown to your direct guests
-
Rate Code will be used to map /connect to RDX Siteminder if also being sold on OTA channels. This should be an abbreviation of the Rate name eg Bed and Breakfast code would be BB
-
This is the description your customers will see in the booking engine
-
This is a legacy feature which you can ignore
-
Enabling a Rate Plan (toggle the switch green) for RDX (Channel Manager) will allow it to send updates to OTA Channels
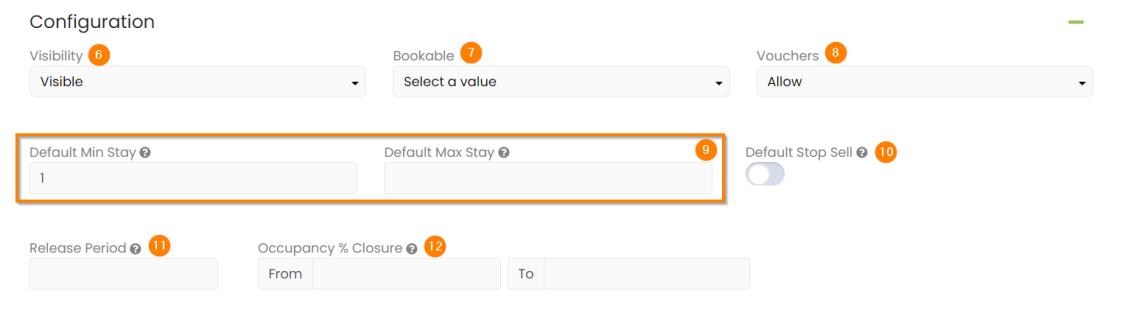
Configuration details:
-
If visibility is set to Hidden Staff Only, your Guests will not see this on the availability page. Staff members will still be able to book these but see point below
-
The rate plan can be set to be bookable or not bookable in the PMS. If set to not bookable, it will not appear as a bookable rate within the calendar
-
Vouchers can be set to be Allowed or Restricted
-
Default Min/Max stay allows you to set a default value for both of these restrictions for all dates in the calendar
-
Default stop sell will create the rate plan with a stop sell applied indefinitely. This can be removed within the grid
-
Release period will set a number of days into the future that the rate plan will be available to book after. Eg Advance Purchase Rates
-
Occupancy % Closure – Auto-adds a stop-sell on dates where the occupancy is outside of the two entered values
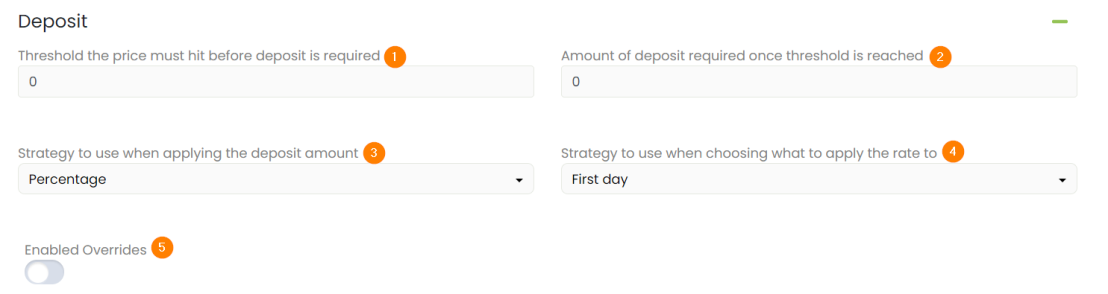
Deposit Details:
-
Threshold is the price must hit before a deposit is required
-
Amount – Can be a whole amount or a percentage
-
Strategy to use – Decides a strategy if 2 differing strategies are combined on 1 Booking
-
Strategy – Applies deposit requirement to first night or whole reservation
-
This enables the deposit when toggled to green
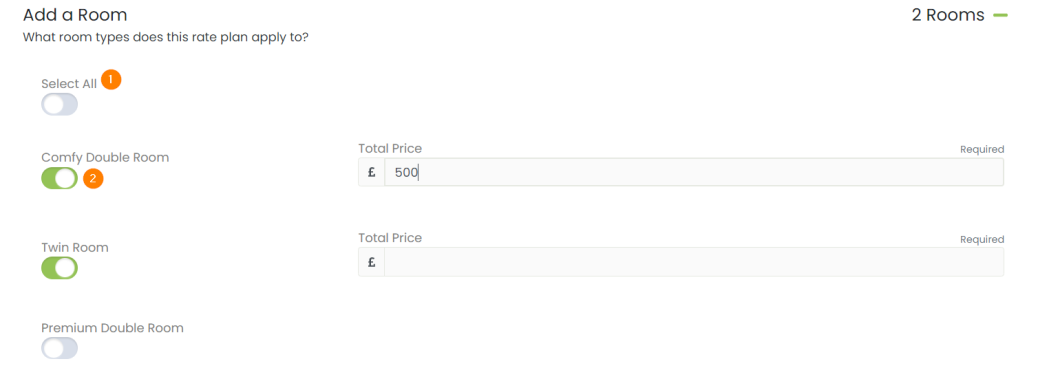
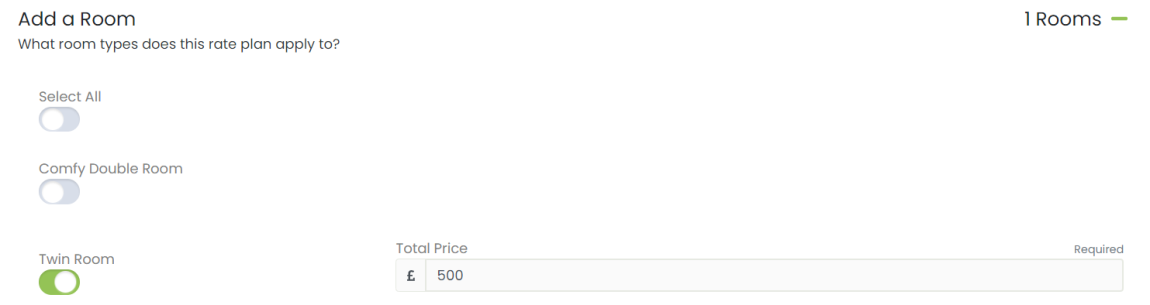
Add a Room:
Each Room that you want the Rate Plan to apply to must be selected and a Rack rate added.
-
Toggle ‘Select All’ to enter a base rate for every room. Or toggle each room individually
-
This is where you can enter a rack rate
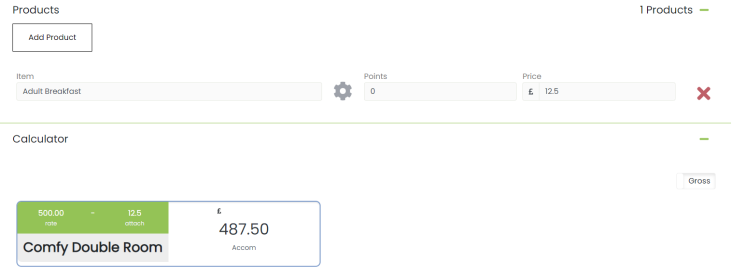
Products:
Products are inclusive of the rack rate set above, but apportion revenue to additional sales categories.
If the rack rate is £100 but your breakfast is £20, £80 will go to your accommodation revenue category and the £20 to your food category.
To add a product, select ‘add product’.
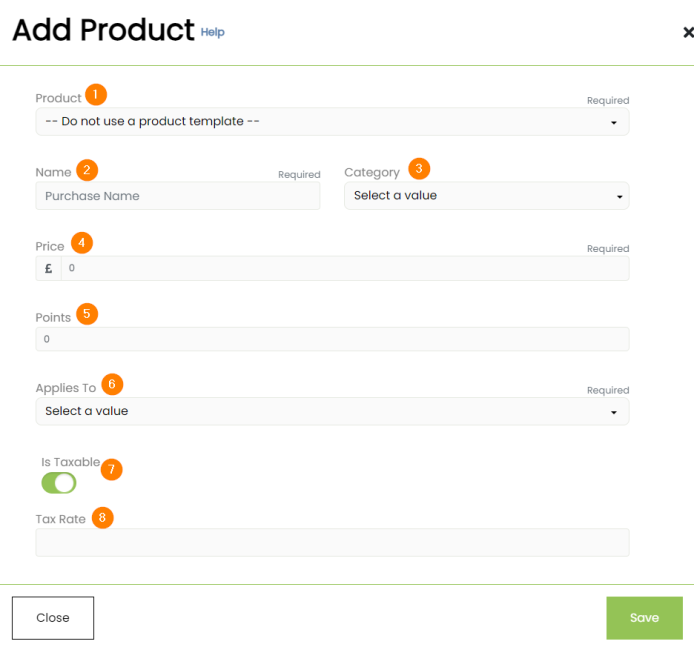
Adding a Product:
-
You can select an existing product in your inventory
-
Product name. This will automatically populate upon selecting a product
-
The sales category the product belongs to. This will automatically populate upon selecting a product
-
Price of the product. This will automatically populate upon selecting a product
-
Loyalty points awarded. This will automatically populate upon selecting a product
-
The product can be applied to the reservation, stay, adult, or child
-
Whether the product is taxable or not. This will automatically populate upon selecting a product
-
If taxable, the tax rate. This will automatically populate upon selecting a product
Each room that you select for this rate plan will display at the bottom of the rate plan creation page with a calculator of revenue.
The calculator shows each Room Rate and the breakdown of the prices for each Room Rate based on the Rack Rate entered above and the attached Products that have been set up as part of the Rate Plan.
Additional Features and Settings
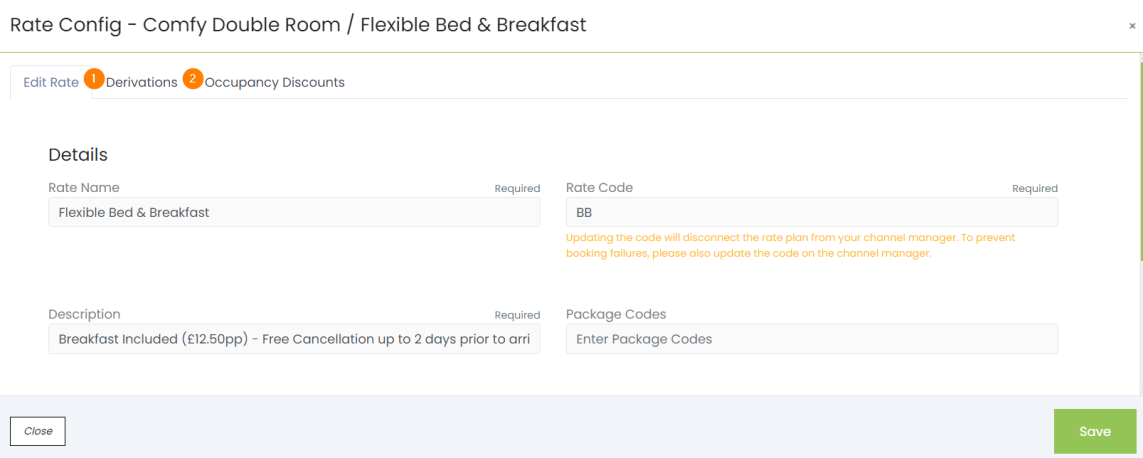
Clicking on the Rate Plan name or the edit pencil located on the right hand side of the page will bring up a lightbox.
The lightbox is divided into three tabs. The first tab, Edit Rate, allows you to edit any of the settings set in the above section of this module.
Additionally, there are two extra configuration tabs:
Derivations – these allow you to set a default price based on a flat amount or percentage from another rate
Occupancy Discounts – these allow you to adjust the price based on occupancy
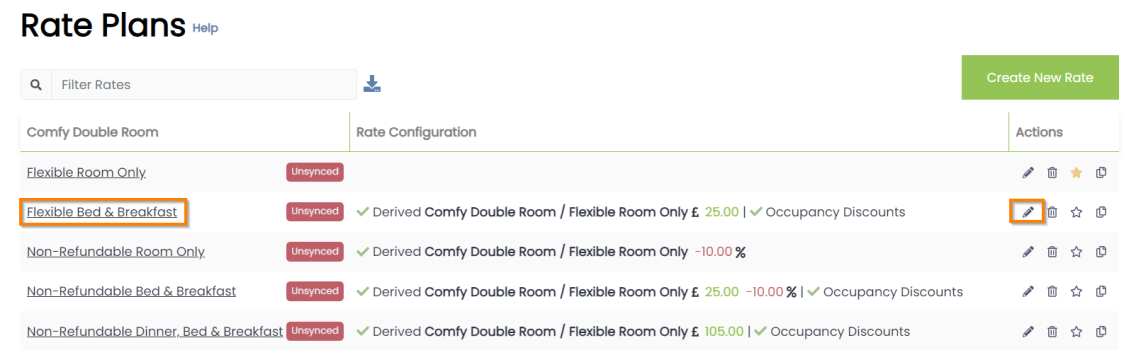
Derivations
Any rate can be derived from another rate.
The price on a derived rate will automatically update when the original rate is updated saving the hotelier time.
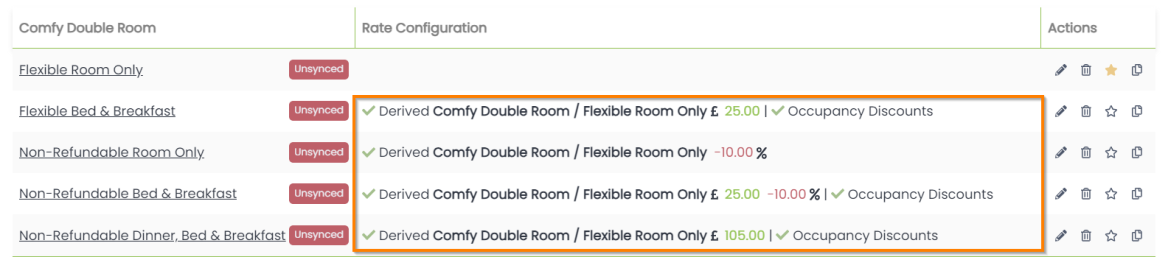
Derived Rate Plans will display on the Rate Plans page with the derivations visible.
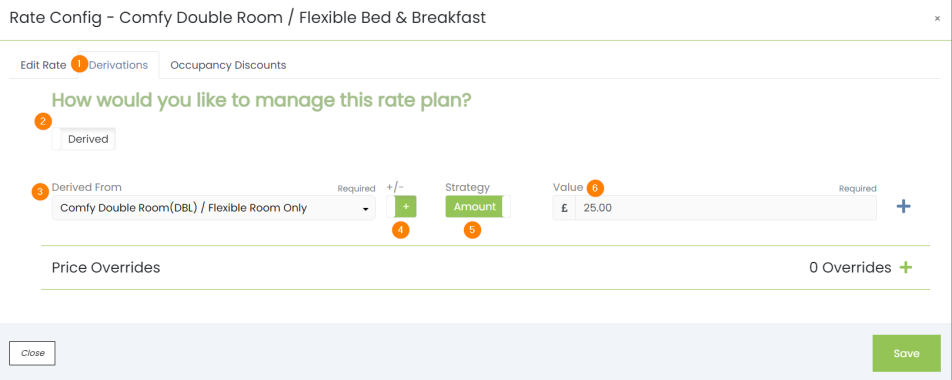
Adding a Derivation:
To add a derivation, edit an existing rate plan.
- Select the Derivations tab at the top of the lightbox
- In this box, change the manual box to derived by clicking on it
- In this drop down, select the rate you’d like to derive from
- The rate can then be increased(+) or decreased(-)
- The Strategy allows a selection of either Amount or Percentage
- Finally, the desired value can be entered
Occupancy Discounts
This allows you to discount the rate based on occupancy.
In the example below, if one person books the room they will receive a discount from the base rate of £12.50.
- Select the 3rd tab at the top of the Rate Config panel
- Click the button to add a discount. You will need to add a discount for all occupancy levels. ie. For a triple room you’ll need to add a separate discount for 2 people and 1 person (£10 for 2 people, £20 for 1)
- Select the occupancy level for the discount
- The Discount Strategy can be set to an Amount(£) or Percentage
- The Discount Value needs to be entered
- Select the days that the discount will apply to (selected days will show green)
Once set, the rate plan page will display that there is a discount on the rate.
Copying an Existing Rate Plan
Existing Rate Plans can be copied to save time or to add to a newly created Room Type.
The copy icon can be found in the Actions panel on the right hand side.
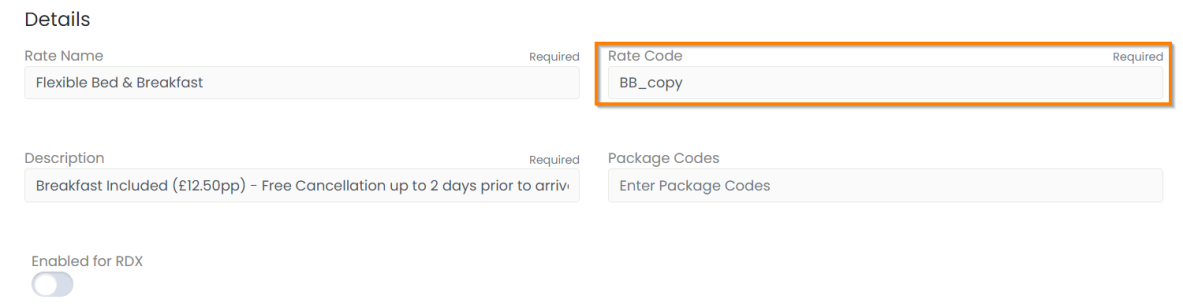
Once the icon has been clicked, the existing Rate Plan’s configuration page will appear.
In this example, the Bed and Breakfast (BB) Rate Plan has been copied. The rate code, however, appears as ‘BB_copy’.
This should be edited correctly before saving.
To complete a Copied Rate Plan set up this must be assigned to the correct Room Type and a rack rate entered.
Once the new Rate Plan has been saved make sure the following is updated:
- Update all Rates and Restrictions on the new rate plan via the Grid page
- Set the new Rate Plan to derive from an existing Rate Plan if required. Edit the rate plan to set this
- Add any Occupancy Discounts required for the new Rate Plan. Edit the rate plan to set this