Tables
The Tables tab allows you to manually add new table numbers.
The Aztec Table Numbers section allows you to configure Tables to read the table numbers directly from Aztec. By enabling this setting, Tables is always up-to-date with all changes to table numbers that are made in Aztec. Tables can also be added manually, without a link to Aztec.
Tables Topics
Setting Up Tables
There are two ways to set up Tables.
-
Automatically Use Aztec Table Numbers
-
Manual Creation
Enabling Automation
To set up tables to Automatically Use Aztec Table Numbers:
-
Select the tick box for Automatically Use Aztec Table Numbers
Once ticked, a confirmation box will display:
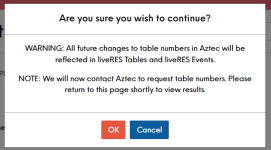
-
Click OK
Once enabled, the list of tables will sync and all table number will be greyed out. If you need to change the tables numbers you can now do so within Aztec. When new tables are created in Aztec, this results in additional table numbers being added to the Tables app and they will adopt the default cover size of 1-2. You will then need to make the required changes in the Layout section.

Manual Creation
The Tables section allows you to add single tables, bulk loads or you can use the check-boxes to multi-select tables for deletion.
To add new tables:
-
Select Add New Table or create a range of numbers and select Add Tables
-
Click Save Changes
Once you have added your Tables, your next step will be to configure the minimum and maximum capacity for that table. You can find this under Layouts.