Buy X Get Y
When a loyalty account holder buys a specified number of items, an item or points / currency can be given as a reward.
Buy X Get Y Topics
About Buy X Get Y
-
describes this promotion for ease of identification and must be unique within this program.
-
Status is read only at this stage and can be set once the Reward is saved successfully (see note at end of procedure).
-
If you know the Entity Code of the item that triggers this reward, enter it here. This number can be viewed in Aztec Product Modelling.
If you prefer, you can click Choose Product Categories to display the category tree of all available products. From the left-hand Available Categories pane you can select an individual trigger product or all products in a group; the group being division, category or subcategory. Click the > button to move the selected trigger product(s) to the right-hand Selected Categories pane. Click OK.
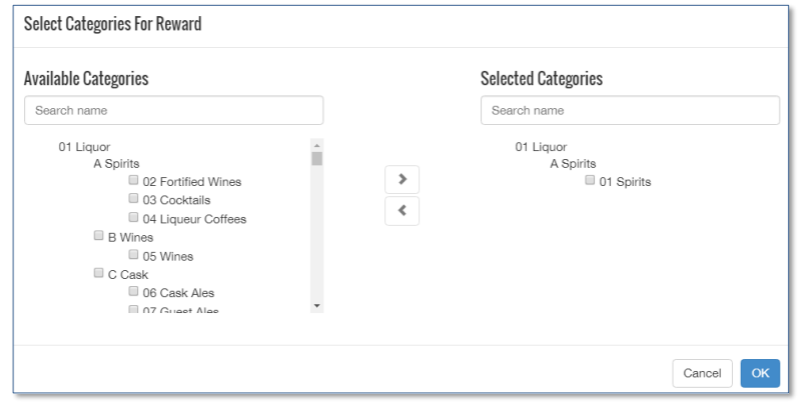
If subcategory is chosen, a further option to Choose Products is displayed in the main rewards screen (example highlighted below) and individual trigger products can be selected from there as required.
If you need to remove any previously selected product or group that is currently displayed, click Choose Product Categories and move the item no longer required from 'Selected Categories' to 'Available Categories’.

-
If the Minimum spend per item field has an entry, this reward is only triggered if this amount or greater is spent on the specified item in the Aztec ID field. By applying a minimum spend, you can ensure you are not double discounting on any free items that may qualify towards a stamp
You can add additional items needed to trigger the reward by clicking the Green Plus icon. If multiple lines of products are identified, a customer buying any one of the items on the list will trigger the reward. To remove any of the products from the list that trigger this reward, click the Red Cross icon
-
The Quantity of the above required field applies to all products identified above and must contain an entry
-
Valid From 00:00 (12am) On and Valid To 00:00 (12am) On show the only date range that the trigger item(s) can be applied. This can be left blank if there are no date restrictions. Click Add Schedule to choose a specific day, date or month or time period. You can add more than one entry by clicking Add Schedule and repeating this action. If not used, the trigger item(s) have no date / time restrictions
-
In the Reward given when above reached group box:
-
Enter the Product Entity Code of the reward item. If you prefer, you can click Choose Product to display the Search product to reward screen. Here you can locate an individual reward product by division, category or subcategory
-
Choose the Discount Price or Discount Percent that will be applied when the reward is triggered. If an item is to be given free, the price can be entered as 0 or the discount percentage as 100
-
Define the availability of the reward item. Click Add Schedule to choose a specific day, date or month or time period. You can add more than one entry by clicking Add Schedule and repeating this action. If not used, the reward item has no date / time restrictions
OR
-
The Points or Currency amount that are triggered as a reward (if a free or discounted item are not appropriate)
-
-
The Expiration section allows you to set an expiry on the use of this reward. For example, you can set it to be available to redeem for example up to 3 months from when it was triggered. Note that this is separate to the Valid From / To Dates above in that even if the To Date has passed, the reward can still be redeemed for up to 3 months after it was added to the account. If used, Expiration Interval Type can be set to Day, Week or Month and Expiration Intervals requires the entry of a number to define the length of the expiry period
-
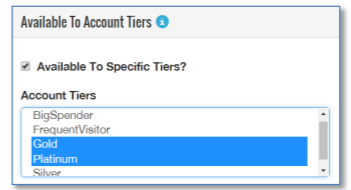
The Available to Account Tiers section allows you to make this reward only available to specific account tiers. By selecting the Available To Account Tiers check box, you can select one or more tiers from the list of tiers displayed in the drop-down list. Click to highlight a single tier or Ctrl+Click to multi-select tiers. Leave this check box unselected for this reward to apply to all accounts, regardless of their tier. Account tiers are defined in Defining Account Tiers
-
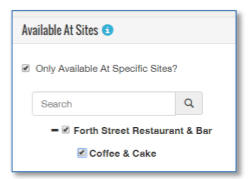
The Available at Sites section allows you to apply the reward to certain sites only. In the adjacent example, this reward is only available in the Coffee & Cake outlet. To apply to specific sites, click the Only Available at Specific Sites check-box and then select the site(s) from the estate structure. To ensure the reward is applicable to all sites, leave the check-box unchecked
-
Within the Reporting section, select the include Balance in Extracts check-box if you want the balance of this reward to be included in the Balances extract. Only those rewards that are deemed `free’ will be exported. If the reward is defined as having a value of points to be exchanged, or to be available at a certain price/discount, then the balance will not be exported
-
Balance Widget Display is described in Displaying Widget Balances