Managing Cards
Managing the cards that are associated with a loyalty program is simplified with cardsets functionality. To make the ordering / printing of additional cards easier, and to make grouping and downloading of numbers more effective, you can also create batches within cardsets.
-
Cardsets can be used as a repository to manage/ add cards in the same range, as well as offering the option to allow different card configurations. Enrolment cards are normally created in their own enrolment Cardset
-
Adding more cards to the system is a simple process and can be carried out from within the Cardset with the appropriate range. New cards are created with a status of 'Inventory' and when a card is registered or transactional activity is detected, the status is automatically changed to 'Active'
-
Downloading card numbers, for example to provide a list of newly added cards to the card supplier, or to bulk credit or analyse further
Managing Cards Topics
Create Cardsets
Follow these steps to create a new cardset:
-
Click +Create New
-
Enter a cardset Name
This should be a unique (within the estate) identifier for this cardset -
Select a Card Enrolment Order
This setting only requires an entry if the cardset is intended for use with enrolment (used as the default enrolment cardset). Select the order in which cards in the cardset are assigned by the enrolment process, either randomly or sequentially (from the previously allocated one) -
Select the Card Number Configuration.
This forms the group of rules used to generate the card numbers and is the combination of Card Prefix, Card Characters, Creation order and Checksum Type. If you already have an existing range in use for a different program, and this is suitable for this cardset, this configuration will be available for selection in the drop-down list. On selection of this existing configuration, the system will automatically allocate card numbers following on from the existing range. This allows you to use the same card range without clashing card numbers across programs (card numbers will be unique within the Estate). The system will also automatically populate the following four fieldsIf you do not select an existing card configuration, complete the fields manually as described below. -
Enter a Card Prefix
Use the card prefix previously defined in Aztec to identify your chosen grouping (this could be estate, company, site or program). This must contain at least one character. Aztec card prefix configuration is described under the point of sale prefix groups topic. Cardsets used with programs of 'Gift' type cannot use alphanumeric card prefixes. Ensure only numeric card prefixes are used -
Enter the Card Characters
This signifies the number of digits (including the prefix) used in the unique number that identifies each loyalty card in the set. This can usually be viewed on the card itself. This must be 19 characters or less (including the prefix) -
Select the Creation Order
This field allows you to choose whether card numbers are created in a random or sequential order within the specified range -
Select the Checksum Type
Choose between None or Luhn (to add an extra layer of security)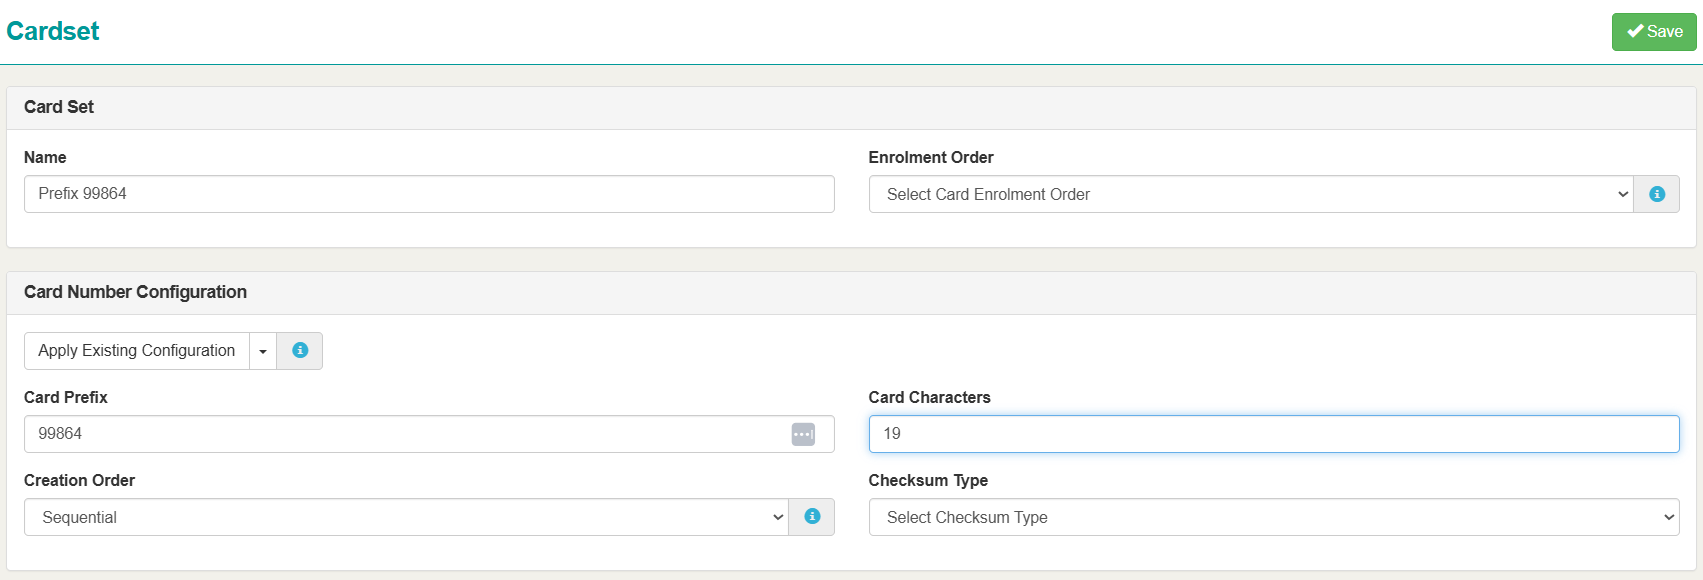
-
Click Save
You are returned to the main screen for your new loyalty program. Note that the cardset is just a repository and the system is now ready for cards to be added. This is not done automatically - refer to Add new cards to an existing cardset.
Deleting Cardsets
If an existing Cardset does not contain any cards and is no longer required (for example created in error), it can be deleted.
Follow these steps to delete a cardset:
-
Select the Card Set Name
-
Click Delete
The Delete button will not show if there are cards in existence to that cardset. In order to delete a cardset, you will need to delete the included Cards -
A prompt to confirm will display, click Yes
Once confirmed, a green message will display stating: Cardset deleted successfully
Add New Cards to an Existing Cardset
When new cards need to be added to the system, the most effective way of doing this is to add them to the Cardset that already has the card configuration (existing range) defined. Once the Cardset is created, all future card additions are quick and simple operations.
Follow these steps to add cards to existing cardsets:
-
Select the required cardset
-
Click Add Cards
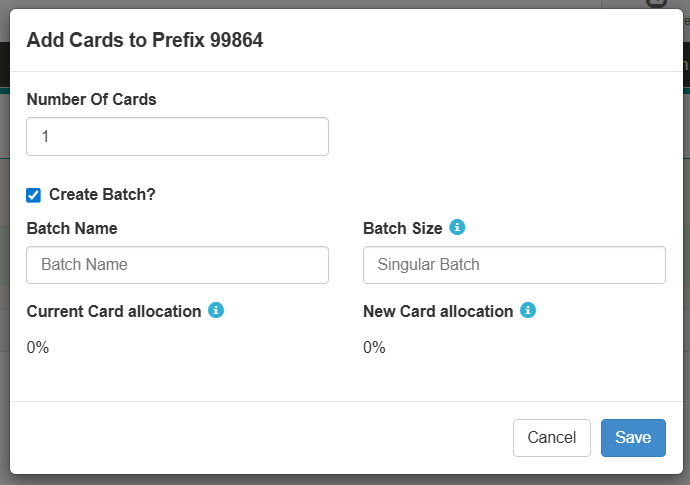
The Add Cards window is displayed where you can add the required amount of cards
-
Complete the following fields
-
Number of cards – in number format, enter the amount of cards to be added to the Cardset
-
Create Batch? – batches are groupings that help to manage all your cards on the system, for example batches can be used to fulfil corporate orders for gift cards, for sectioning site-specific loyalty cards, or for providing batches of card numbers to a third party supplier. Reporting is also more powerful if you use batches. Deselect this check box to not use batch settings
-
Batch Name – a batch name must be unique within a Cardset. You may want to use the card supplier’s batch name to assist with identification and administration
-
Batch Size – if you add 100 cards (entered in Number of Cards field above) and enter 100 as the batch size, then one batch of 100 will be created. If you have added 1000 cards and enter a batch size of 200, then five batches of 200 will be created
Current Card allocation – this field shows the percentage of numbers used on the system, as a proportion of the numbers available (this can vary depending on creation order and whether the range is in use across multiple programs). This field is display only
New Card allocation – this field shows the percentage of numbers, as a proportion of the numbers available that this new card range addition will use and helps to indicate if a Cardset is near to its full range allocation (this can vary depending on creation order and whether the range is in use across multiple programs). This field is display only
-
-
Click Save
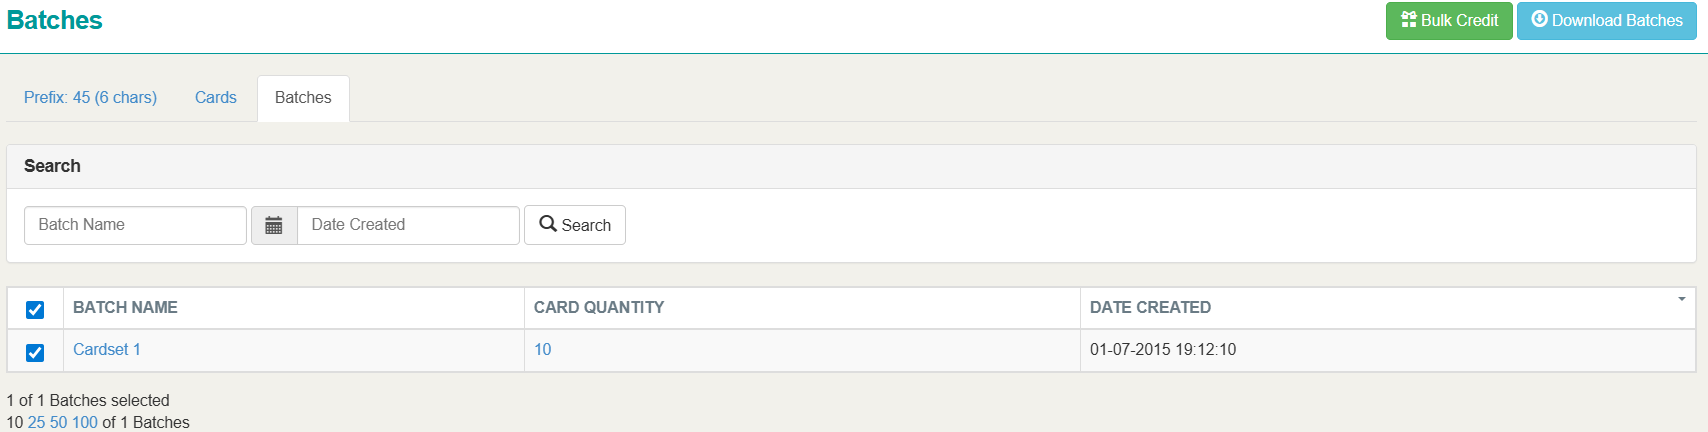
Managing Batches
When an existing cardset is viewed, by selecting it from the Cardsets screen, the window also contains tab pages for Cards and Batches to provide quick links for associated administrative tasks. The Batches tab page within Cardsets allows you to view all batches within a specific cardset.
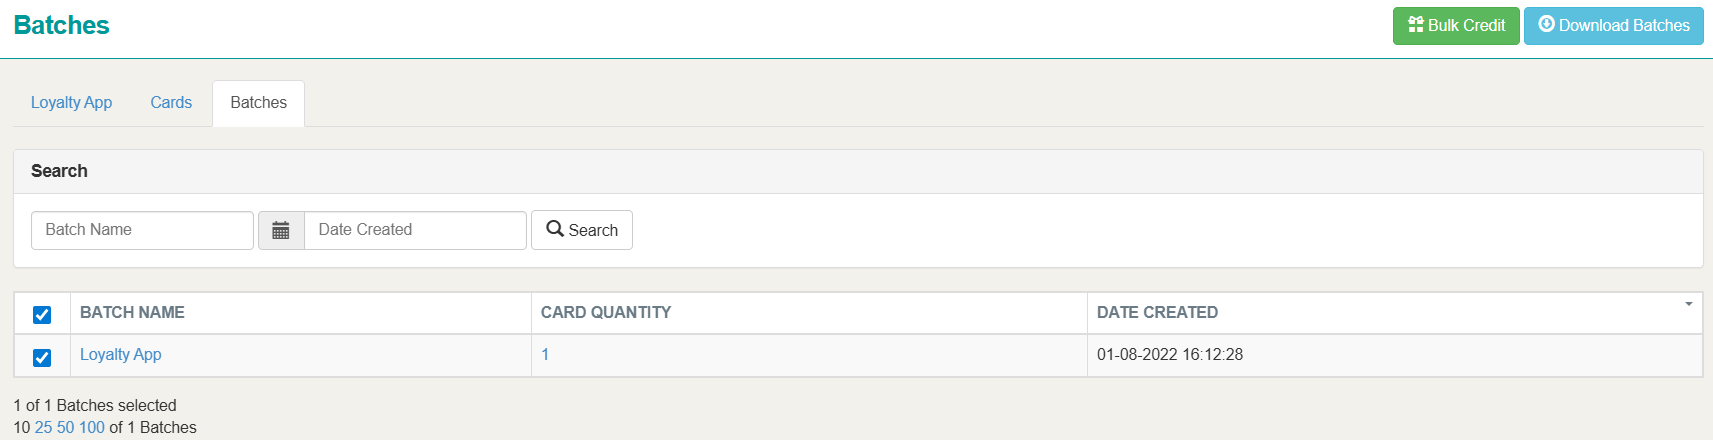
You can use the batches screen to:
-
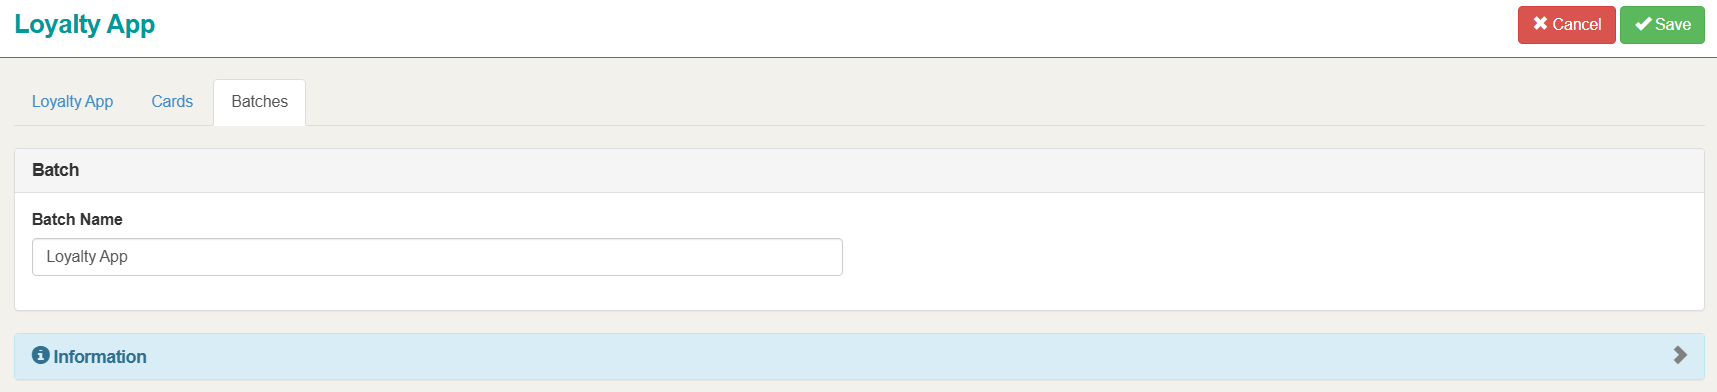
Amend Batch Name – Select Batches → choose a Batch → click Edit → update the Name → click Save
-
View Cards in a Batch - Select Batches → against a batch click the Card Quantity

-
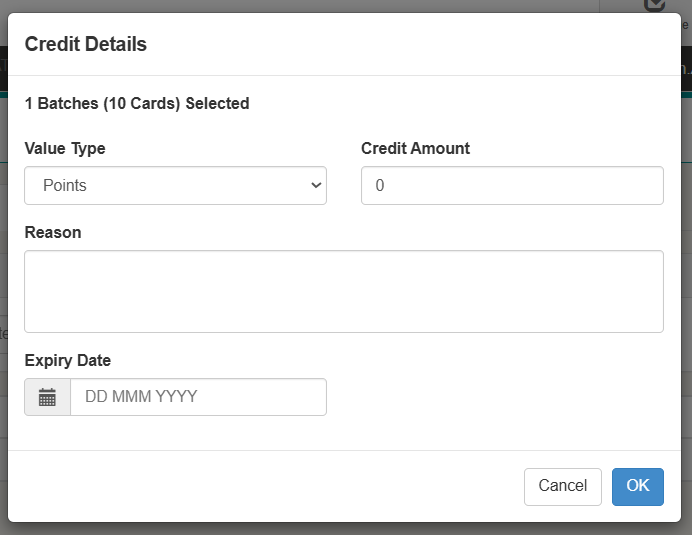
Bulk Credit Cards in a Batch - Select Batches → set the check box for the required Batches → click Bulk Credit
-
Select the required Value Type - Points or Currency
-
Enter the Credit Amount
-
Enter a Reason
-
Enter an Expiry Date (if applicable)
-
Click OK
-
-
Download a .zip or .csv file of Cards in a Batch or Group of batches - Select Batches → set the check box for the required Batches → click Download Batches
-
Select the Download As format - CSV or ZIP
-
If ZIP is selected a Password can be set by selecting the check box for Password Protected
-
Enter and Confirm the Password
-
-
Click OK
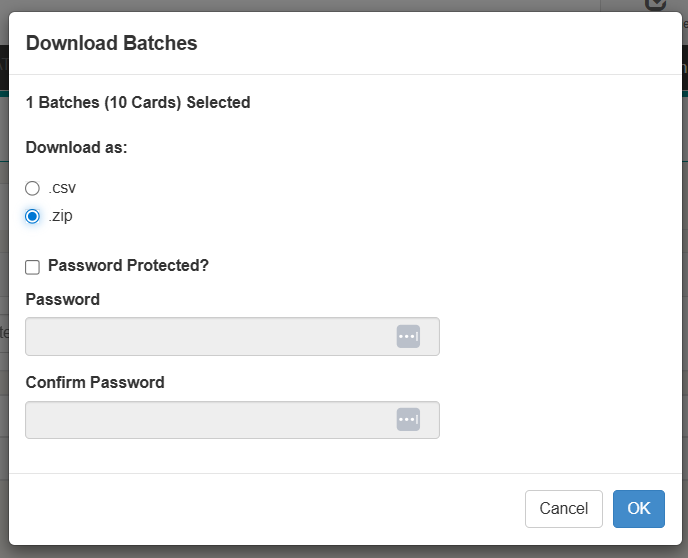
The file will be downloaded to your computers downloads folder
-