When a sales item has been created as a purchasable item the supplier tab becomes active and allows the configuration of the supplier information against the item.
Suppliers Topics
Step 2 of 4
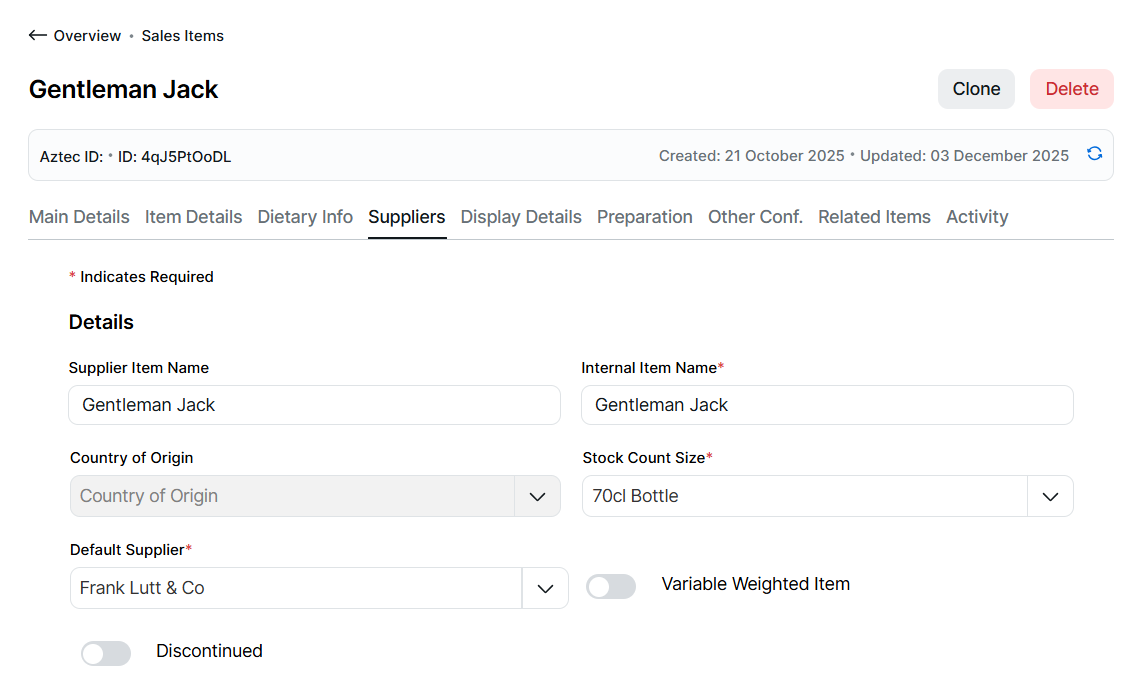
Completing Supplier Details
Follow these steps to configure this section:
-
Update the Supplier Item Name and Internal Item Name (optional), by default these will be populated from the main sales item name
Supplier Item Name is the new term for an Aztec Product Modelling B2B name & Internal Item Name is the new term for an Aztec Product Modelling Invoice Name -
Select the required Stock Count Size | and select the required Default Supplier
The default supplier must be set before the Edit button becomes available to add purchase units further suppliers can be configured for the item within the edit screenBased on the "add option" selected in step 1 Stock Count Size and Default Supplier fields will automatically be pre-populated -
If the item being added is for a variable weighted item, select the Variable Weighted toggle to on
-
If the item being added (or edited) is not available for ordering, select the Discontinue toggle to on, click Yes
Adding Purchase Units
Follow these steps to add purchase units:
-
Click Edit
-
The default supplier selected will be displayed, click Add New Purchase Unit
-
Select the required Pack Size
Only units of the same type (volume / weight / items) will be displayed for selectionBased on the "add option" selected in step 1 Pack Size will automatically be pre-populated with the same information as contained in the Stock Count Size field -
Enter the following details Variant | Product Code | Barcode | Cost Price | Can Order
Variant is the new term for an Aztec Product Modelling FlavourOnly purchase units that contain a different variant can use the same pack size (from the same supplier)
-
Continue adding purchase units for the same supplier or click Add Supplier | select the New Supplier
Upon selection of the new supplier it will automatically navigate to this supplier to add new purchase unitsIf more than one purchase unit has been entered for the same supplier the default purchase unit check-box will become available, the first entered unit will be set the default but can be changed as required to any other entries within the list -
Optionally an image can be added to the purchase unit | click the image place holder and from media manager select or upload an image
When an image has been added clicking the image will display the full size version which can be removed or replaced -
Click Apply | the supplier information will be displayed in the table below settings
-
The table can be searched by the following full or partial search terms:
-
Pack Size
-
Variant
-
Product Code
-
Barcode
-
Price
-
Editing Purchase Units
Follow these steps to edit purchase units:
-
Click Edit
-
Update any of the following fields (per supplier):
-
Image
-
Pack Size
-
Variant
-
Product Code
-
Barcode
-
Price
-
Default
-
Can Order
-
-
In addition to updates suppliers and purchase units can be deleted:
-
Select a supplier | click Delete
The default supplier as set in the supplier details section cannot be deleted, in order to delete this supplier change the default and then proceed to the Edit option -
Select a supplier | click the delete icon against the purchase unit row
-
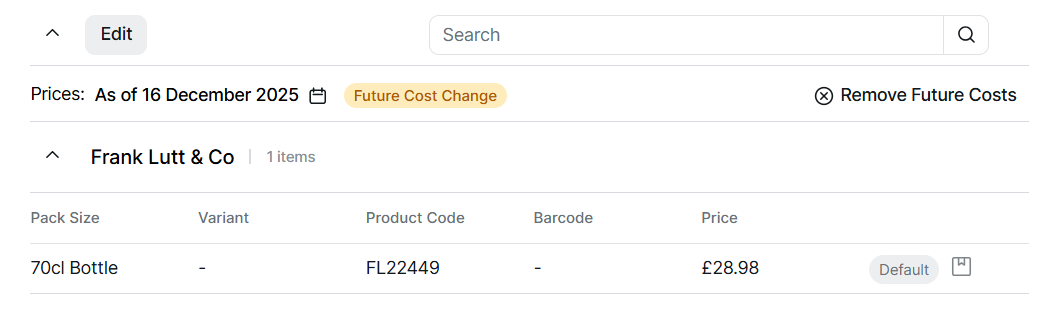
Adding Future Dated Cost Prices
To prepare for price changes in advance future dated prices can be added to a purchase unit.
Follow these steps to add a future dated prices:
-
Select the calendar titled "As of Today"
Future dates with costs already configured will be displayed with a yellow dot below the date -
Choose a date in the future for which you wish to add future costs | click Apply
-
Click Edit | update the price of any purchase unit and supplier
When editing future prices no other fields can be edited -
Click Apply
Removing Future Dated Cost Prices
Follow these steps to remove future dated cost prices:
-
Select the calendar titled "As of Today"
-
Choose the a date where a future record exists, indicated by the yellow dot below the date | click Apply
-
Click Remove Settings | confirm Remove
Field Settings & Information
Details
The details section allows you to set the names and other primary supplier information.
| Field | Description |
|---|---|
| Supplier Item Name | Supplier name for the sales item (replaces Aztec Product Modelling B2B name) - 50 characters |
| Internal Item Name | Internal name for the sales item (replaces Aztec Product Modelling Invoice name) - 50 characters |
| Country of Origin | Country of origin of the sales item |
| Stock Count Size | The standard count of size of the sales item when using Aztec Stocks |
| Default Supplier | The default supplier of the sales item |
| Variable Weighted Item | The variable weighed item toggle is used to define items purchased from suppliers that have a weight between x and y, it is used between Acquire and Aztec+ Stocks to help identify the correct weight when items are delivered and updating stocks |
| Discontinued | The discontinued toggle will prevent an item from being ordered |
Suppliers & Purchase Units
The suppliers and purchase units section allows you to set the purchasable items per supplier.
| Field | Description |
|---|---|
| Pack Size | The pack size of the sales item, only units of the same type as the stock unit are displayed |
| Variant | The variant of the same purchase unit pack size - 10 characters |
| Product Code | The suppliers product code for the purchase unit |
| Barcode | The outer barcode for the purchase unit |
| Price | The cost price for the purchase unit |
| Default | Check box to define which is the default items pack size provided by the supplier (only 1 pack size per supplier can be default) |
| Can Order | Check box to define if the individual purchase unit can be ordered, pack sizes unchecked will not be available for ordering |