Line Checks
Line Checks provide an efficient way to monitor key products throughout a stock period, helping you stay on top of items that previously showed variances or require regular attention. Depending on your system configuration, daily mandatory checks can be set up, prompting you each day via the Things to Do List to complete the required line checks.
An additional way to perform Line Checks is by using the Spot Check function on point of sale terminals. As this is accessed front of house, it’s particularly useful when swapping out kegs, allowing you to record an accurate count of full kegs in real time.
Line Checks Topics
Performing Line Checks
Follow these steps to perform a line check:
-
Click Do a Line Check
-
Select the required Product Division | click Next
-
Apply filters or search for the required products

Select the required products by setting the Selected check box
Any products displayed in red are those that are defined as the required mandatory line check products, additional items can be added as required -
Click Next | if required click Yes to print the Count Sheet
-
Enter the counted values for the selected items in the Line Check Audit
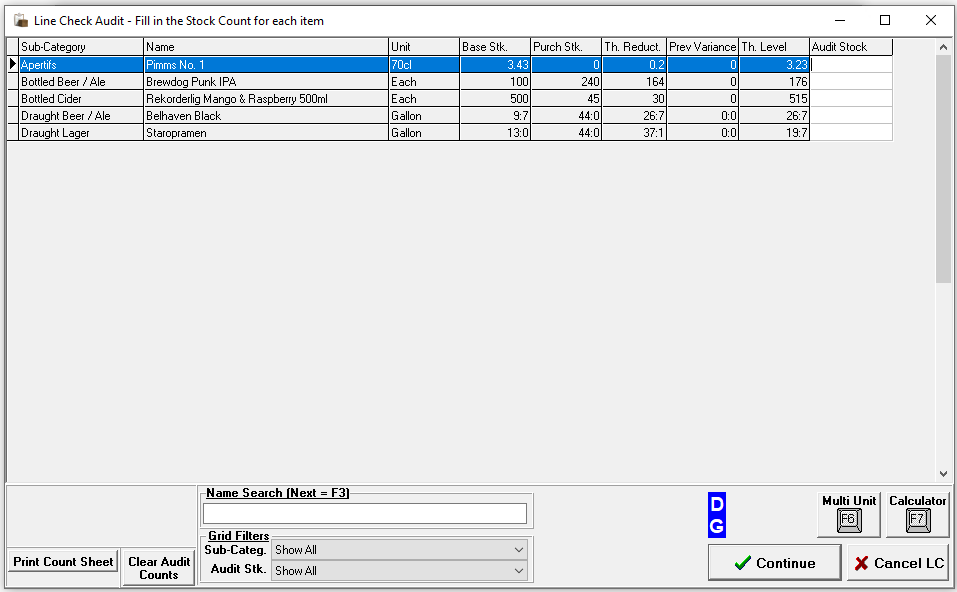
-
Click Continue
-
Review the Loss / Gain Report to verify the results for the line check
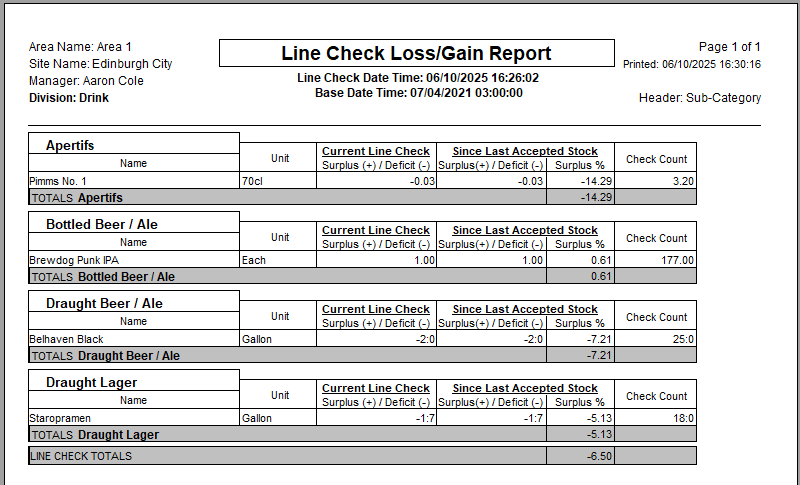 This report will give an overview of any losses or gains on the this line check allowing further monitoring or additional extra checks to made as required
 -
Click Close | click Yes to save the line check and exit
-
Enter any relevant Notes if required | click Done
Viewing Line Check Reports
Follow these steps to view past line check reports:
-
Click View Line Check Reports
-
Select a check from the list | click View Report
The Loss / Gain Report will be displayed
Line Check Templates
When performing Line Checks, templates can be created and saved for future use, making it quicker and easier to select the required items by simply choosing a saved template.
Follow these steps to create a template:
-
Click Do a Line Check
-
Select the required Product Division | click Next
-
Apply filters or search for the required products
Select the required products by setting the Selected check box
-
Click Save Selection as New Template
-
Enter a Template Name and Comment (optional)
-
Click Save Template
Using Template in a Line Check
When performing a line check follow these steps to use the template:
-
Click Copy from Template
-
Select the required Template

-
Click Copy Selection
All products from the template will be selected in the product selection screen, additional products can be added or those already selected from the template can be deselected as needed
Proceed with the line check
Managing Templates
Follow these steps to manage templates:
-
Click Manage LC Templates
-
Select an existing Template
-
Update the Name or Comment as required
or
Click Delete | confirm Yes to delete the template