The second section when configuring a choice are the options, these are the items that can be selected when the choice is displayed during the ordering process.
Options Topics
Step 2 of 4
Adding Options to the Choice
Follow these steps to configure this section:
-
Search for the required options to add to the choice
The following types can be added to a choice: Sales Item | Choice | InstructionClick here for more information on filtering and searchingProduct Structure Filter & Search Tips
When searching for product types you can:
-
Use the product structure to select 1 or more parts of the hierarchy
-
Click into a drop down and either type to search or scroll through the list of available items and select
-
Select filters from multiple sections, to provide more accurate results
-
Click the X on the selected item to remove
-
-
Apply a filter by selecting product tags
-
Use search to find items by main name, description, Aztec ID or external reference
-
-
Select the required options | click the check box for each option or to select all check the box in the table header
To help the selection each option listed is displayed with its type badge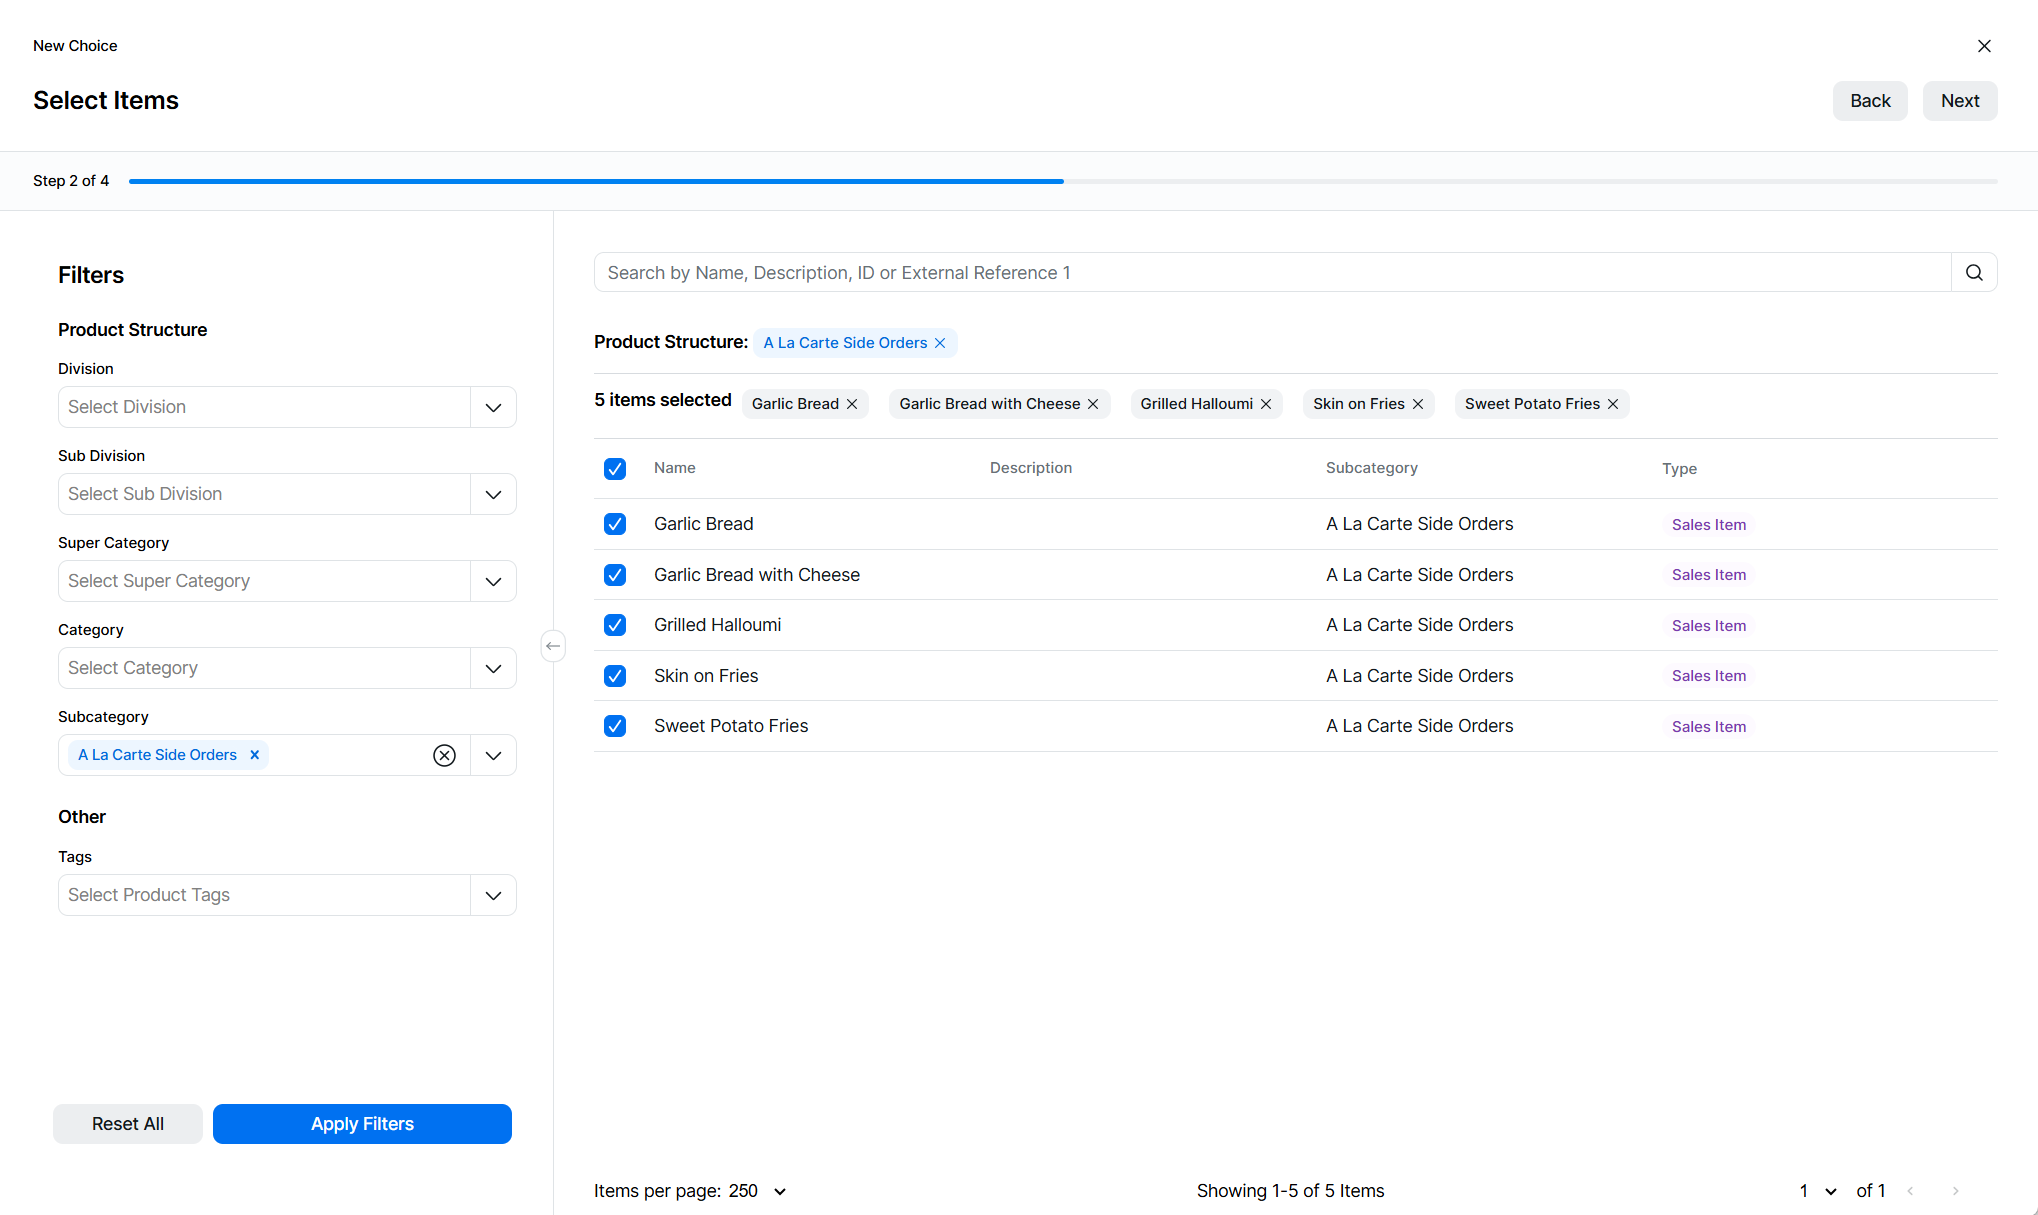
-
Continue filtering and searching until all options are selected, selected items are displayed at the top of the screen, clicking the X on an option will remove it from the selection
-
Click Next
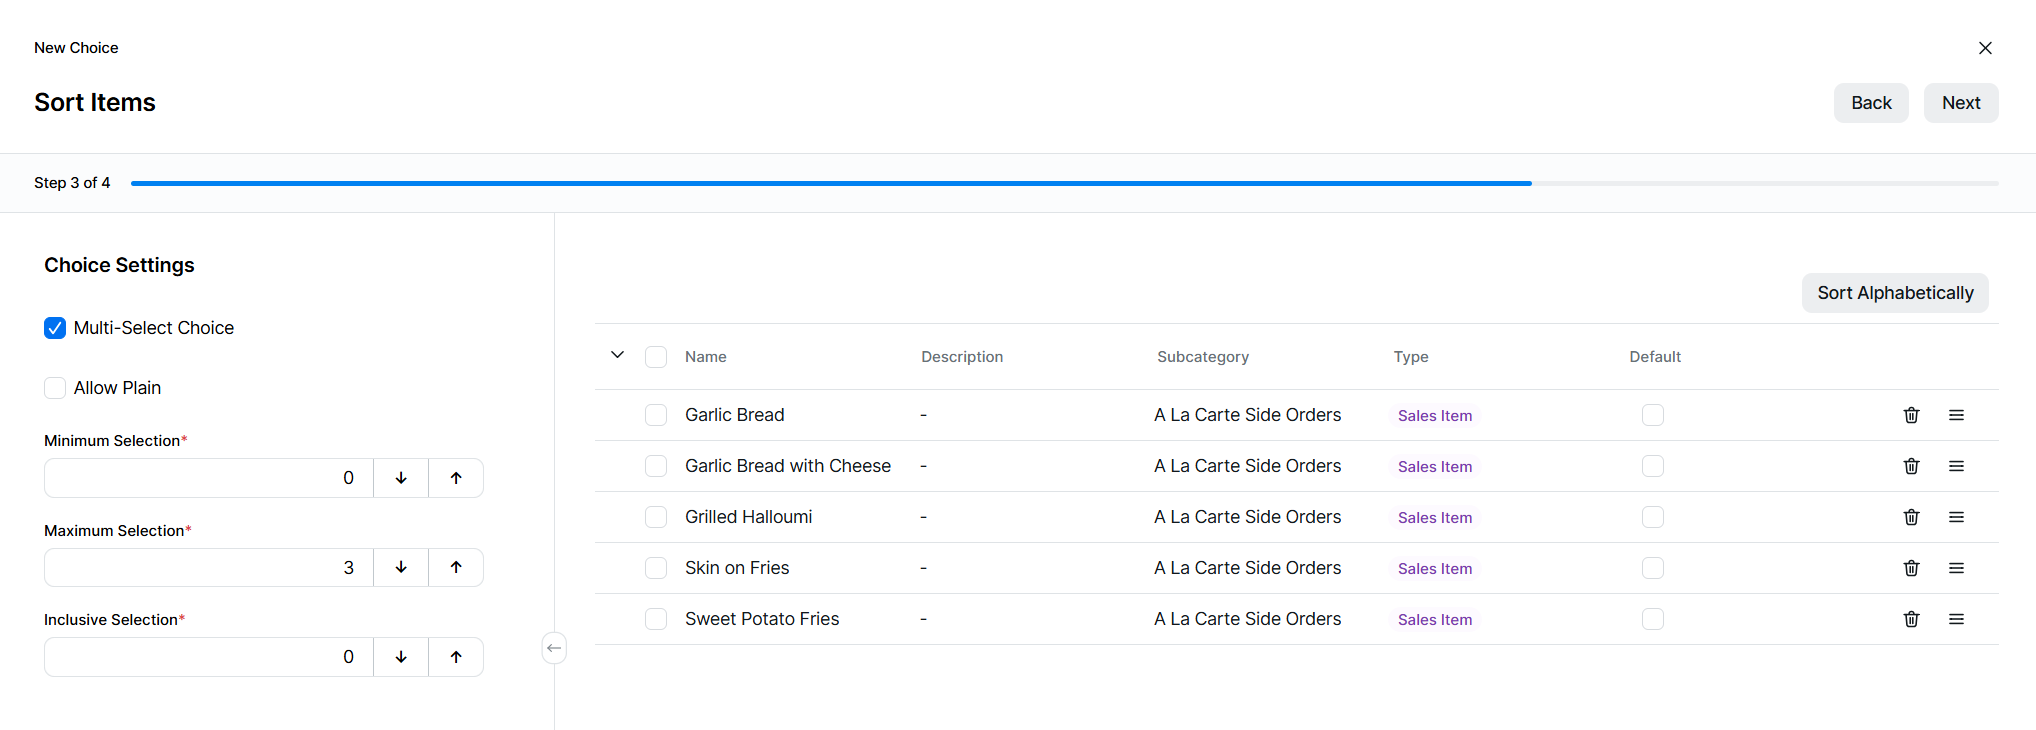
Sorting Options in the Choice
The order in which the options are configured are how they are displayed during the ordering process, they will be shown in the order they were selected in step 2.
If you wish to sort the choice options follow these steps or go to Step 4 of 4:
-
Sort the choice options to set the correct order to be displayed during the ordering process
 Click here for more information on sorting
Sorting Tips
To help sort options you can:
-
Click Sort Alphabetically to automatically sort items
-
Use the drag and drop icon to move options up and down
-
-
In step 1 enabling a choice to be multi select was a configuration that could be enabled, if there are configuration changes to this setting this can also be made on this step by editing the settings in the left hand panel
When a choice has been created and saved any changes to the multi select options should be managed through the edit steps within options (the choice settings will be will still be displayed but only as read only fields) -
Click Next
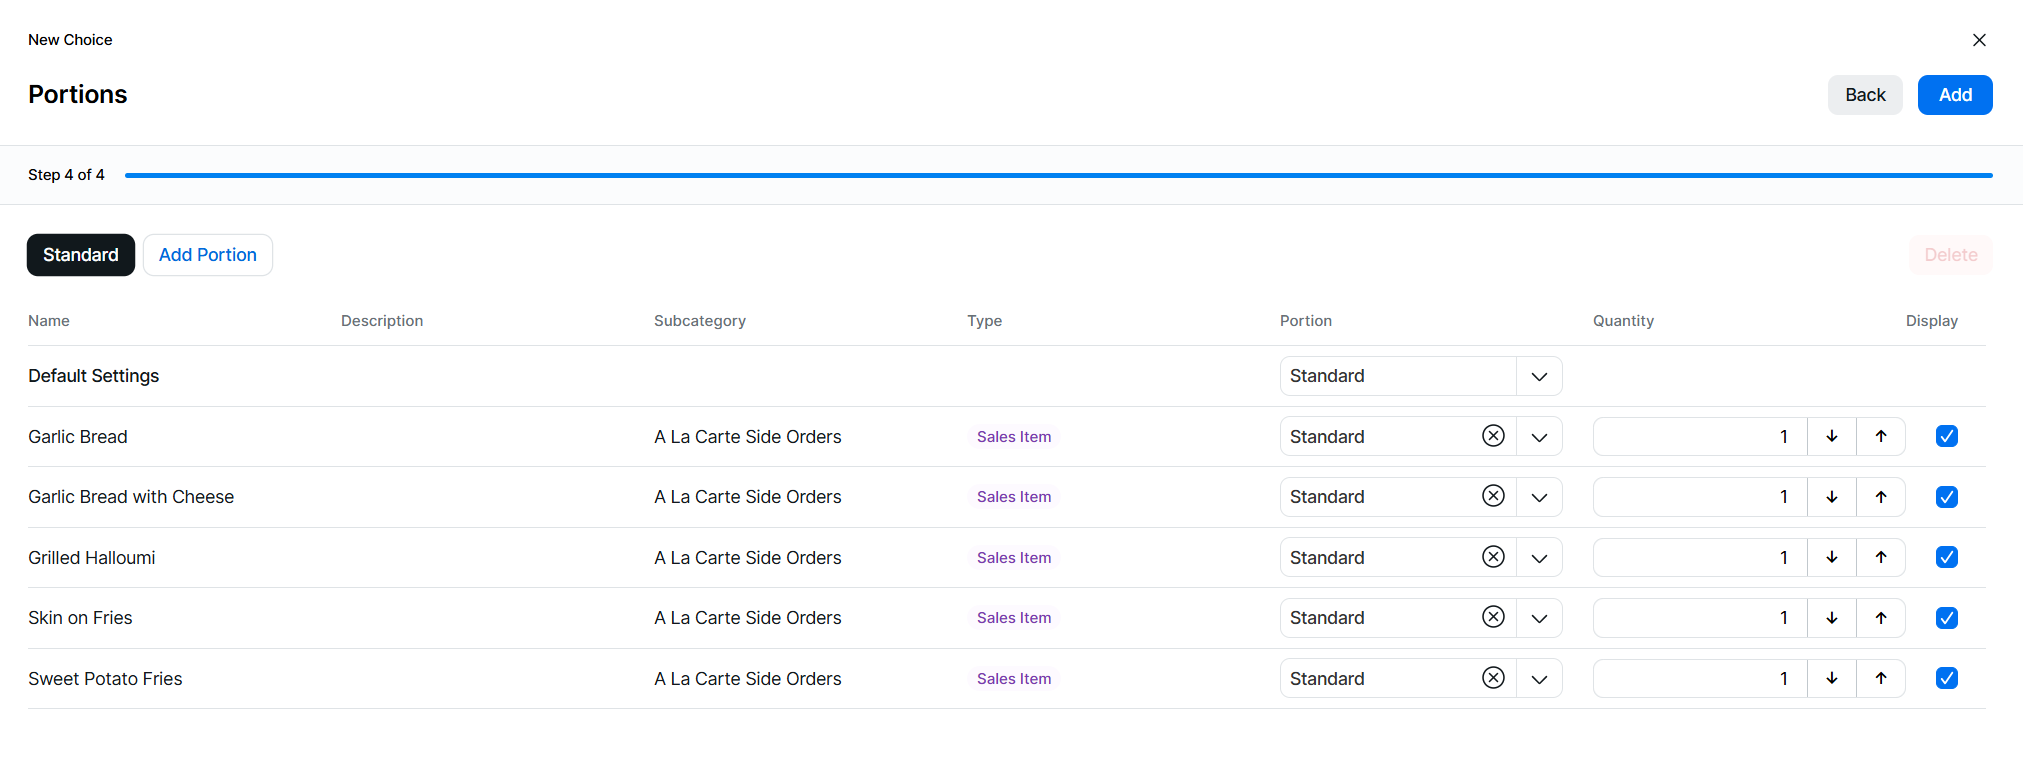
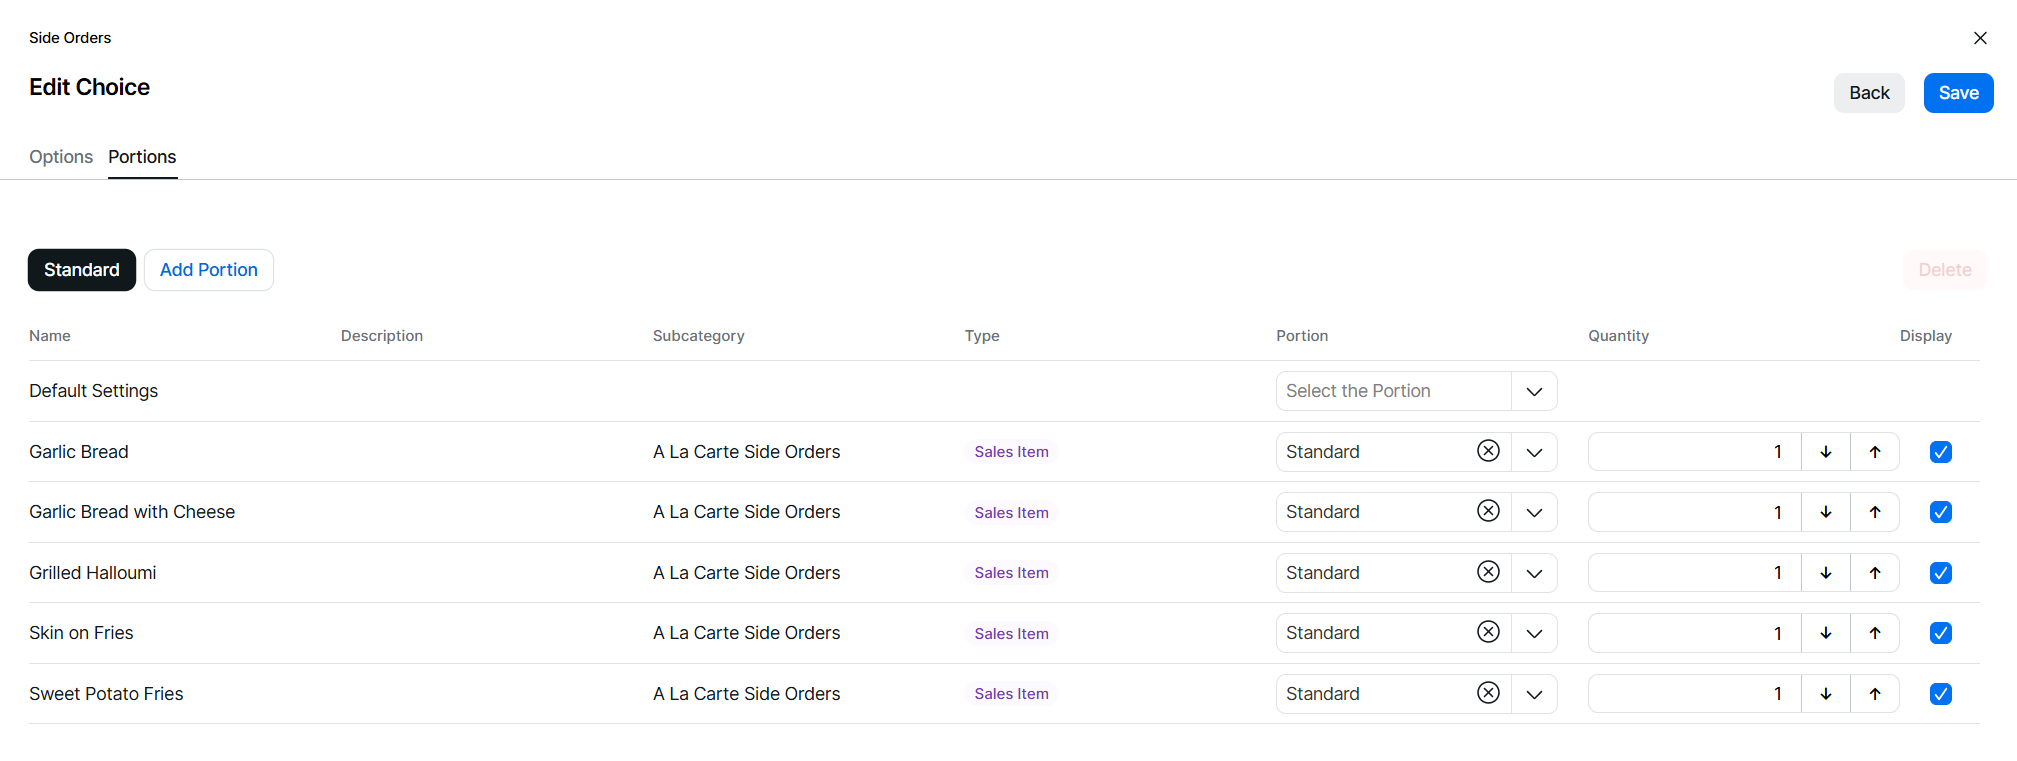
Portion Selection
Each portion selected in step 1 will be displayed and for each sales item or choice the corresponding portion from that item must be mapped so that the correct stock reduction and pricing is used during the ordering process.
Follow these steps to configure this section:
-
For each option added (sales item and choices) select the required portion from the drop down, if all the options use the same portion use the "Default Settings" drop down to apply to each row
If a sale item or choice does not have the corresponding portion selected from the default setting then this will be displayed with "This field is required"
The portion button will be shown in red if there are any unmapped sales items or choices
-
For any items added to the choice the default quantity used will be 1, on a per portion basis it is possible to choose to exclude a certain item from being displayed, by default the "Display" check box will automatically be selected, if you wish to not display a certain option within a selected portion deselect the check box
Alternatively if the options (sales items only) are greater than 1 and should reduce a higher value of stock when sold through the choice then selecting the quantity toggle will enable an additional column for quantity, set the quantities required for any choice items above the value of 1By removing the display check box you can remove a choice option from being displayed during the ordering process, when the display check has been removed an icon will show in the options tab table next to the item to indicate it is not being displayed -
In step 1 if you missed adding a portion to the choice this can be added | click Add Portion | select the portion from the drop down and map all options
When a choice has been created and saved any changes to portions should be managed through the add or edit steps within options (the portions selected will be will still be displayed on the main details but only as read only field) -
The "Standard" portion cannot be removed from a choice, any other selected portions can be deleted | select the portion | Click Delete
-
Click Add
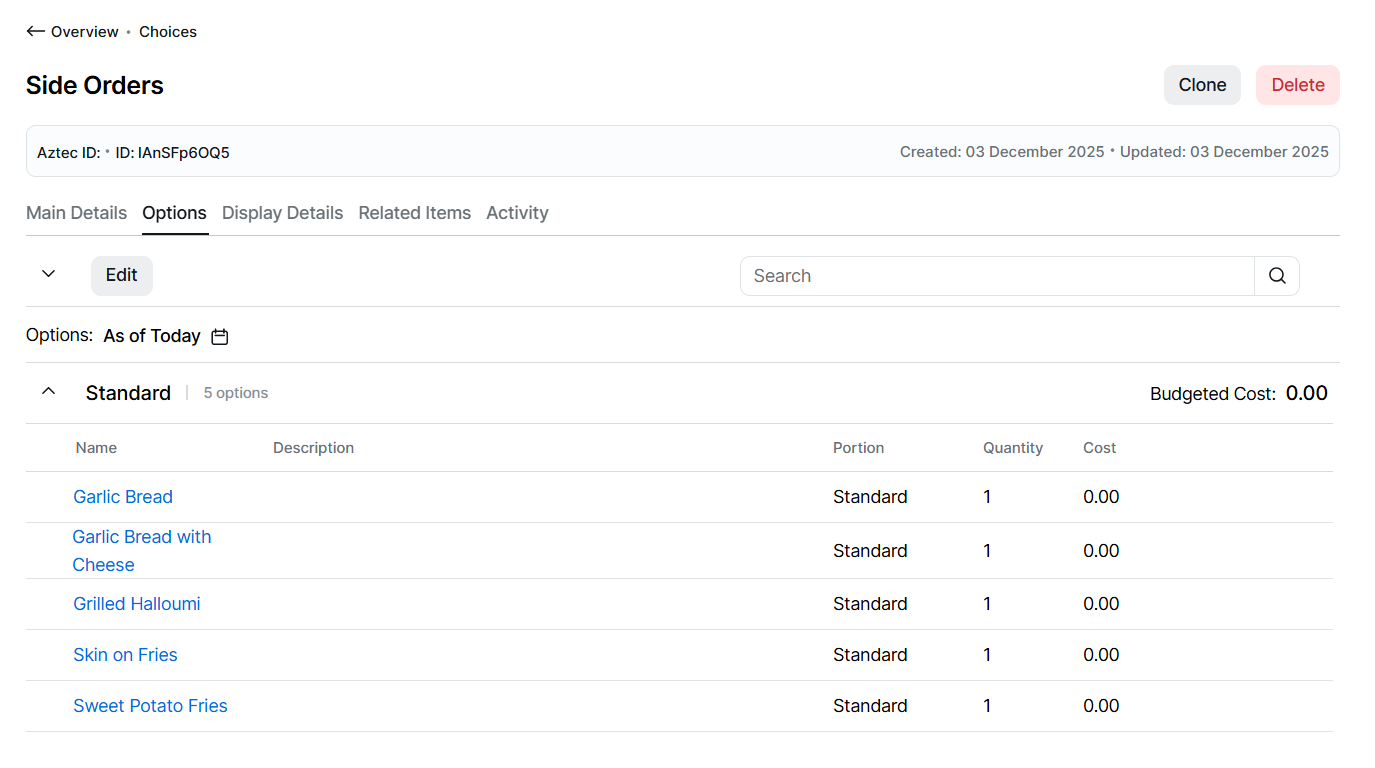
Editing / Adding Options
The edit screen enables the following options:
-
Edit the existing options contained within the choice
-
Change the choice multi-select rules
-
Add additional options to the choice
Follow these steps to edit the choice (when no options were added or to add additional options):
-
Click Edit
-
Click Add
-
Search for the required options to add to the choice
The following types can be added to a choice: Sales Item | Choice | InstructionClick here for more information on filtering and searchingProduct Structure Filter & Search Tips
When searching for product types you can:
-
Use the product structure to select 1 or more parts of the hierarchy
-
Click into a drop down and either type to search or scroll through the list of available items and select
-
Select filters from multiple sections, to provide more accurate results
-
Click the X on the selected item to remove
-
-
Apply a filter by selecting product tags
-
Use search to find items by main name, description, Aztec ID or external reference
-
-
Select the required options | click the check box for each option or to select all check the box in the table header
To help the selection each option listed is displayed with its type badge -
Continue filtering and searching until all options are selected, selected items are displayed at the top of the screen, clicking the X on an option will remove it from the selection
-
Click Add
-
Sort the choice options to set the correct order to be displayed during the ordering process
Click here for more information on sortingSorting Tips
To help sort options you can:
-
Click Sort Alphabetically to automatically sort items
-
Use the drag and drop icon to move options up and down
-
-
Click Portions
-
Follow Step 4 of 4 to configure portion mapping
-
Click Save
Follow these steps to edit the choice:
-
Click Edit
-
From the Options tab:
-
Update the multi-select rules
-
Update the sort order or remove options
-
Click Add and select more choice options

-
-
From the Portions tab:
-
Update existing portions and mapping
-
Delete existing portions
-
Add new portions
-
-
Click Save
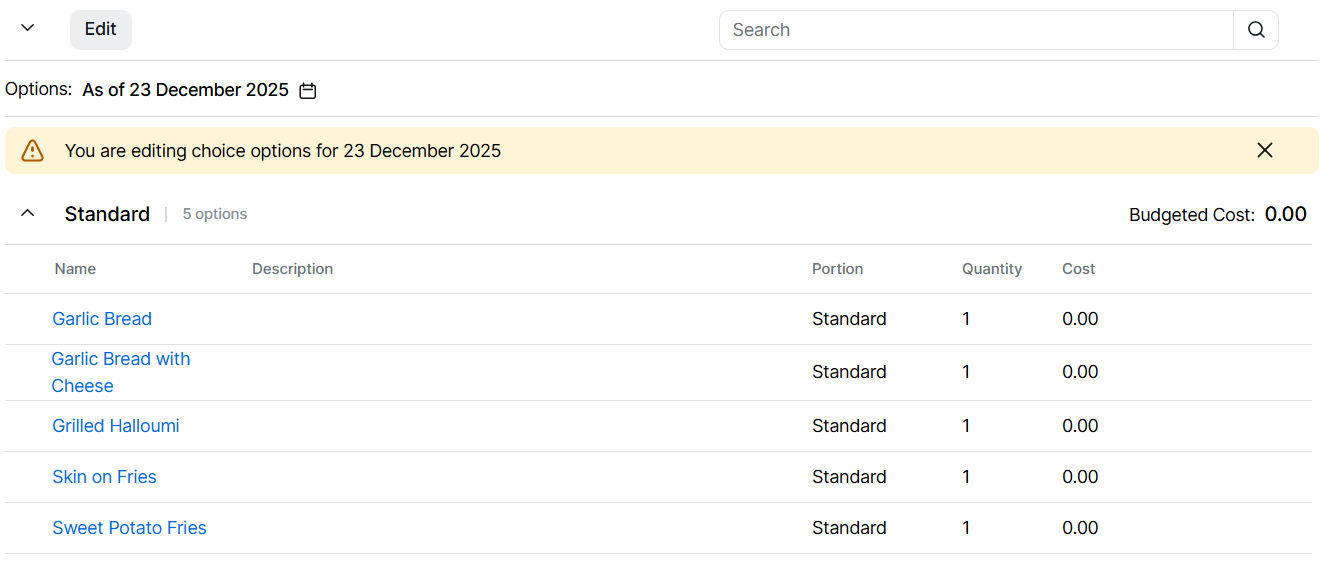
Future Dated Options
Choice options can be configured for future dated changes, enabling updates to be completed in advance.
Follow these steps to create future dated choice options:
-
Select the calendar titled "As of Today"
Future dates with options already configured will be displayed with a yellow dot below the date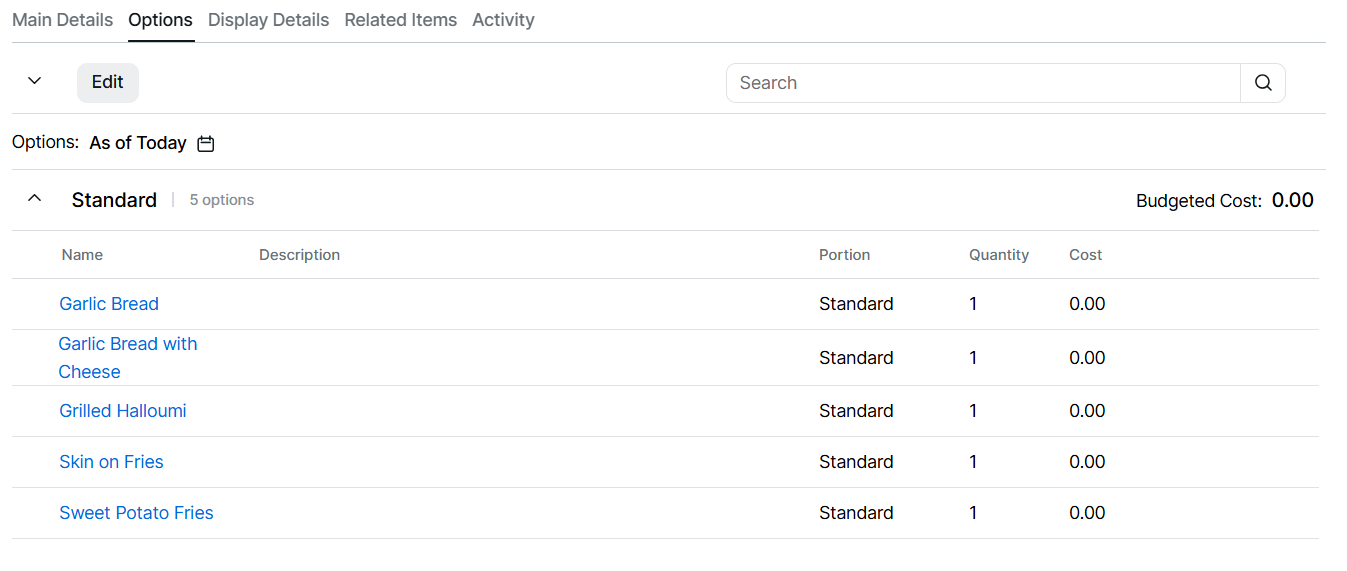
-
Choose a date in the future for which you wish to update options | click Apply
-
Click Edit
-
Update choice options as required including
-
Add new options
-
Removing existing options
-
Editing existing quantities
When editing future options new portions cannot be added -
-
Click Save
Removing Future Dated Options
Follow these steps to remove future dated choice options:
-
Select the calendar titled "As of Today"
-
Choose the a date where a future record exists, indicated by the yellow dot below the date | click Apply
-
Click Remove Settings | confirm Remove
Removing any future dated options will also remove any configured ingredients or cook times for the selected date