Codes
Codes are generated either by creating batches or by uploading a CSV file of pre-existing codes. Each code is assigned a set of rules that determine its redemption behaviour, and codes can be created as either a numeric range or alphanumeric.
Creating Code Batches
Follow these steps to create code batches:
-
Select from the drop down either I want to generate unique alphanumeric codes or I want to generate a numerical range of codes
-
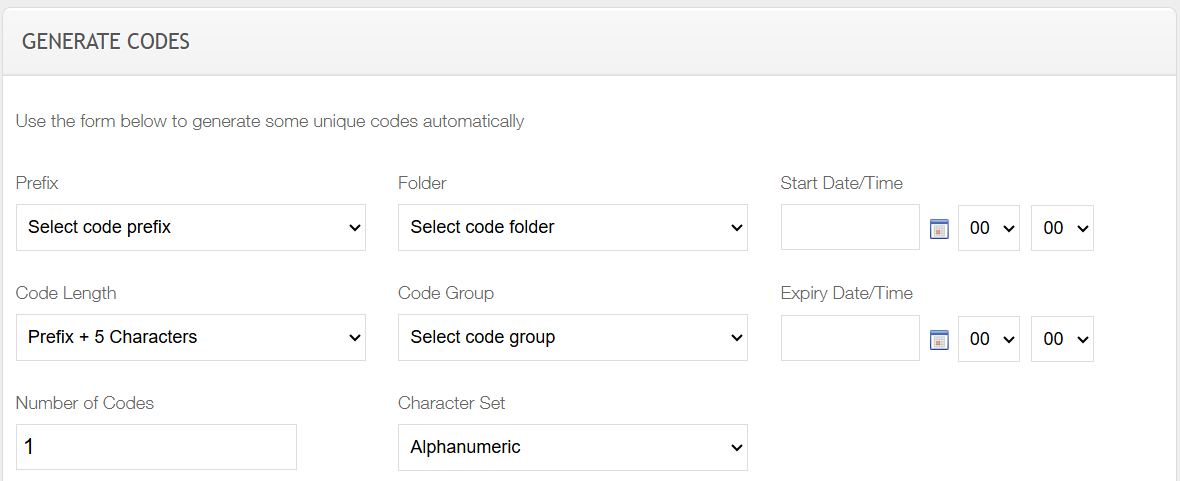
Select and enter the following options from the generate codes section
-
Prefix - the prefix which will be displayed before the unique part of the code
-
Folder - the reporting folder where codes will be associated
-
Code Length - number of alphanumeric or numeric characters that will be included after the prefix
This section is important when configuring the prefix information in Aztec so that the code is correctly recognised -
Code Group - the group where codes will be associated
-
Start Date / Time - start date and time codes will become active from
-
Expiry Date / Time - date and time where codes will expire
This is 00:01am of the day selected, if the voucher is to be useon the last day then the day after should be selected
For alphanumeric code complete the following fields
-
Number of Codes - the number of codes to be generated in the batch
-
Character Set - choose if codes are to be generated as Alpha or Alphanumeric
For numerical ranges complete the following fields
-
Range Start - starting number of the code range
-
Range End - ending number of the code range
The number of digits defined for the range is controlled by the code length selected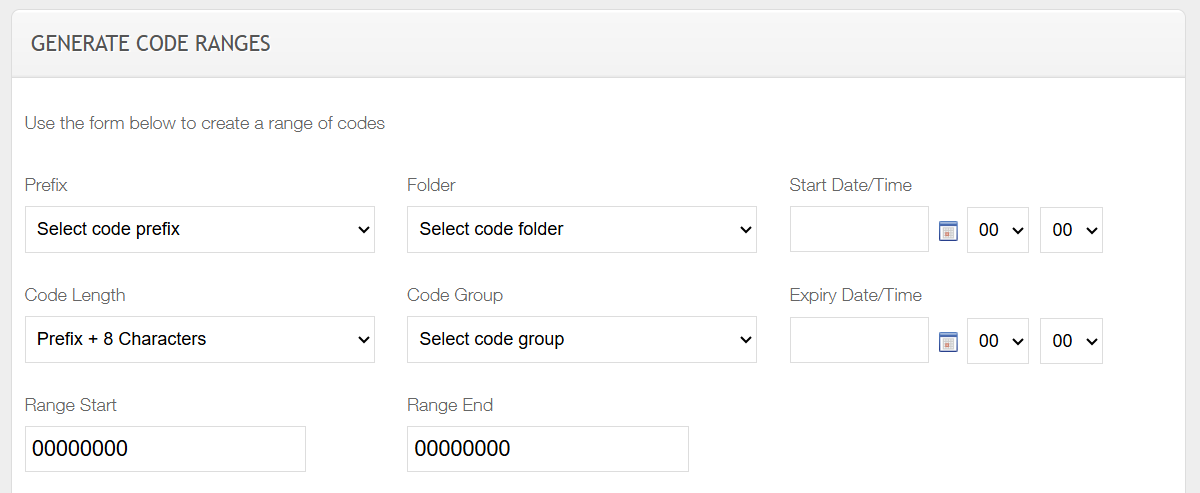
-
-
Select the required Redemption Type - it is possible to add multiple redemption types per batch of voucher codes if required
-
Item - Aztec Product (Recipe or Standard Line)
-
Payment - Aztec Payment Method
-
Discount - Aztec Discount
-
Promotion - Aztec Promotion
-
-
Enter the required Redemptions per Scan
Redemptions per scan sets how many instances of the redemption type will be added to the point of sale -
Enter the Aztec Item Code ID
-
Item - Entity Code from Product Modelling
-
Payment - Make a request to your Zonal Account Representative for this ID
-
Discount - ID from Theme Modelling → Estate Setup → Discounts
-
Promotion - Make a request to your Zonal Account Representative for this ID
-
-
Click Create Range
Uploading CSV Codes
If codes are generated outside of voucher manager a csv file of those codes can be imported enabling the platform to handle the redemption process.
Follow these steps to upload csv codes:
-
Select from the drop down I want to upload a CSV
-
Click Choose File | select the required file from your PC
CSV files must not be any larger than 2MB in size to import -
Select the following options from the upload of csv codes section
- Folder - the reporting folder where codes will be associated
-
Code Length - number of alphanumeric or numeric characters that will be included after the prefix
This section is important when configuring the prefix information in Aztec so that the code is correctly recognised -
Code Group - the group where codes will be associated
-
Start Date / Time - start date and time codes will become active from
-
Expiry Date / Time - date and time when codes will expire
This is 00:01am of the day selected, if the voucher is to be useon the last day then the day after should be selected
-
Select the Redemption Type | Redemptions per Scan | and Aztec Item Code ID
-
Click Upload CSV
Downloading Code Batches
When code batches have been created they can be downloaded and used across other systems as required.
Follow these steps to download codes:
-
Select the required Code Group
-
Select the required Prefix
-
Select the required Folder
-
Click Generate Codes CSV
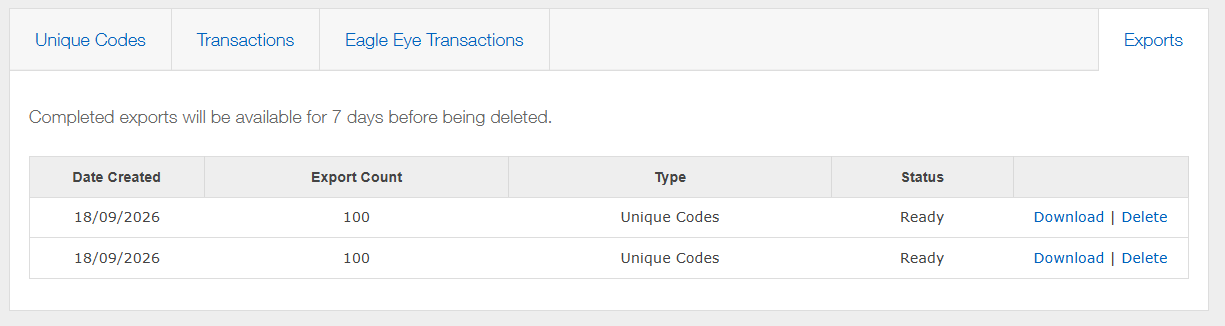
The Exports tab will be automatically displayed and show in a Generating status, when complete it will show Ready | clicking Download will provide the code batch
Completed exports are available for 7 days before they are deleted
The following table shows the data fields included in the CSV
| Field | Description | Example |
|---|---|---|
| Code |
The generated code with prefix |
ACODE1 |
| Group_Name |
Group Name specified in the setup |
|
| Start_Date |
Start Date and Time of the code |
27/01/2026 00:00:00 |
| Expiry_Date |
Expiry Date and Time of the code |
27/04/2026 00:00:00 |
| Aztec_Redemption_Type |
The redemption type either Item, Discount, Payment or Promotion |
Item |
| Aztec_Redemption_Quantity |
The number of items that will be redeemed on a single scan |
1 |
| Aztec_Item_Code |
The Aztec ID that will be sent to the POS |
1000000001 |
| Parent_Code |
If the code was issued on a bounceback campaign then this will contain the code that was used to trigger it |
|
| Redemption_Time | If the code was redeemed then the time will be here | 27/01/2026 15:46:14 |
| Campaign_ID |
N/A |
|
| CLM_ID |
|
|
| POS_ID |
Unique ID from the POS |
17592186044757 |