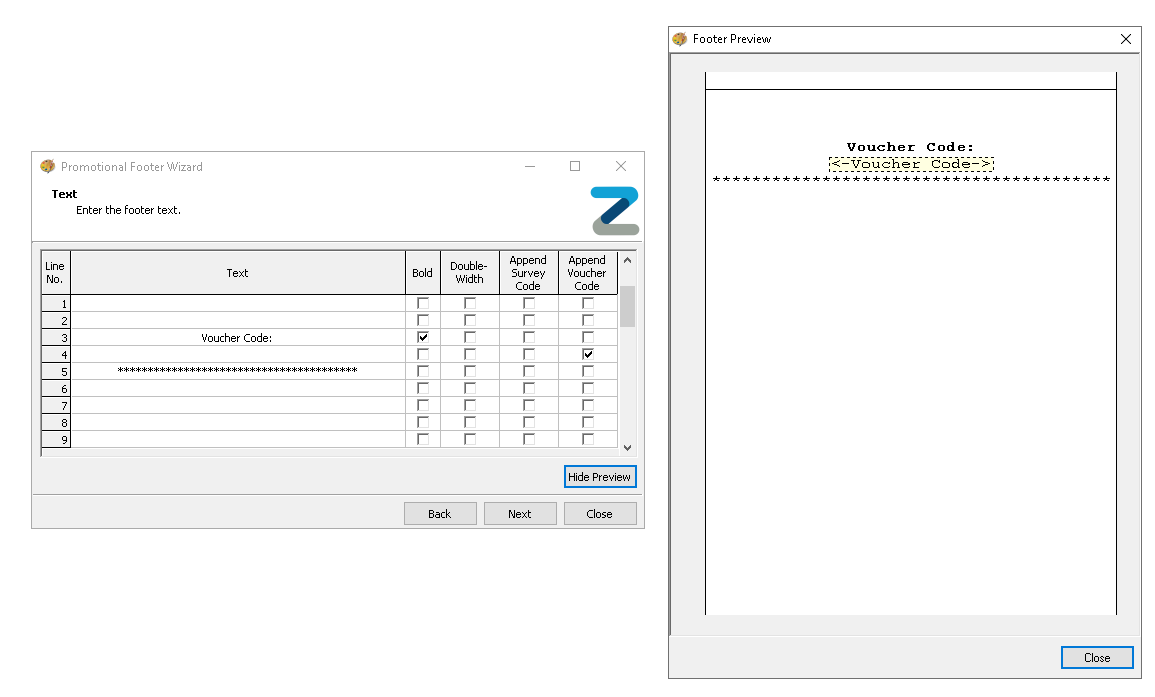
Campaigns - Promotional Footers
Voucher Manager, combined with Aztec Promotional Footers, can issue a voucher code when the footer is printed. This gives guests a bounce-back voucher they can redeem on a future visit.
Promotional Footer Code Topics
Adding Campaigns
Follow these steps to add a new promotional footer campaign:
-
Select Promotion Type - Promotional Footer
-
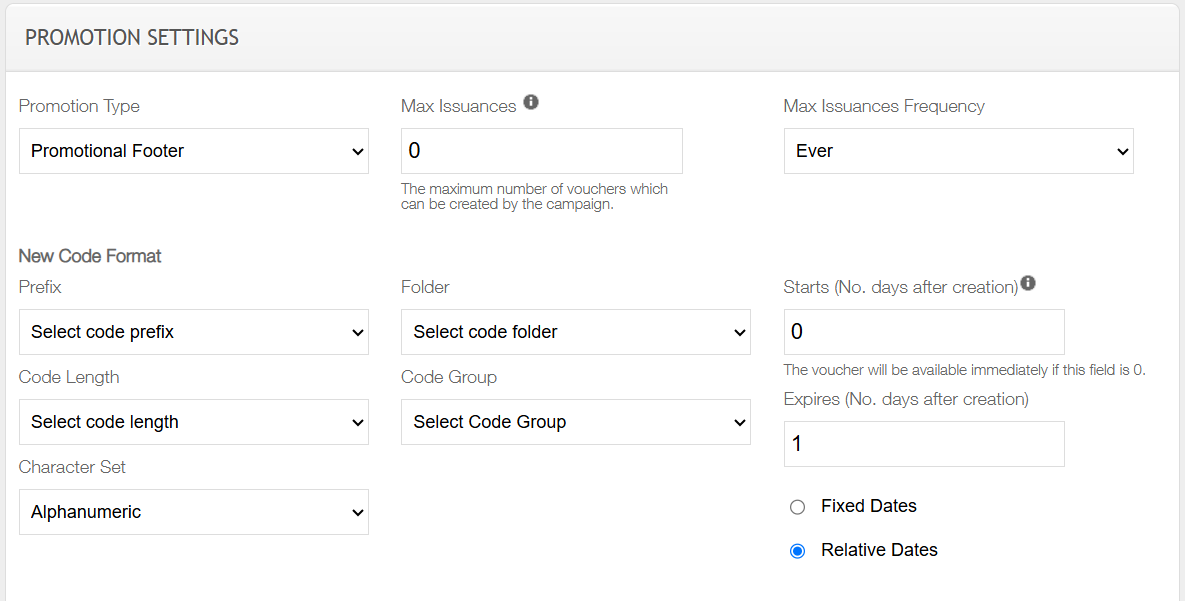
Select and enter the following options from the promotion settings section
-
Max Issuances - the maximum number of vouchers that can be created by the campaign
-
Max Issuances Frequency - select the required issuance frequency - Ever | Day | Week | Month | Quarter
-
Prefix - the prefix which will be displayed before the unique part of the code
-
Folder - the reporting folder where codes will be associated
-
Code Length - number of alphanumeric or numeric characters that will be included after the prefix
This section is important when configuring the prefix information in Aztec so that the code is correctly recognised -
Code Group - the group where codes will be associated
-
Character Set - choose if codes are to be generated as Alpha or Alphanumeric
-
Starts No. Days After Creation - vouchers issued will be available either immediately after creation (if set to 0 days) or set to the required number of days
This setting works in conjunction with the date option being set to Relative Dates -
Expires - No. Days After Creation - vouchers issued will expire after the number of days set
-
Start Date - start date codes will become active from
-
End Date - date when codes will expire
Start / End Date settings work in conjunction with the date option being set to Fixed Dates -
Fixed / Relative Dates - determines when the voucher will start and expire
-
-
Select the required Redemption Type - it is possible to add multiple redemption types per campaign if required
-
Item - Aztec Product (Recipe or Standard Line)
-
Payment - Aztec Payment Method
-
Discount - Aztec Discount
-
Promotion - Aztec Promotion
-
-
Enter the required Redemptions per Scan
Redemptions per scan sets how many instances of the redemption type will be added to the point of sale -
Enter the Aztec Item Code ID
-
Item - Entity Code from Product Modelling
-
Payment - Make a request to your Zonal Account Representative for this ID
-
Discount - ID from Theme Modelling → Estate Setup → Discounts
-
Promotion - Make a request to your Zonal Account Representative for this ID
-
-
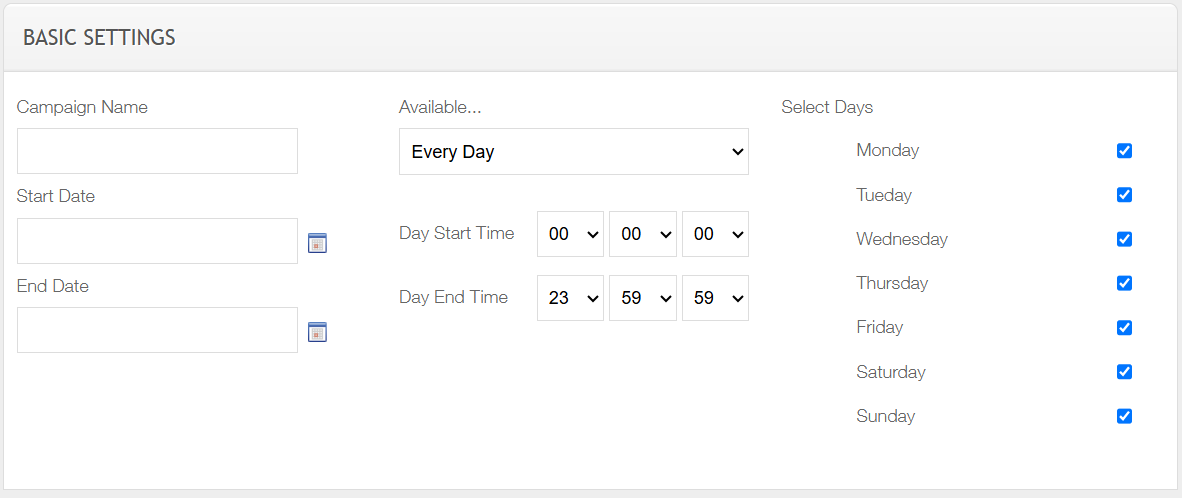
Select and enter the following options from the basic settings section
-
Campaign Name - identifier of the campaign
-
Start Date / Time - start date and time of the campaign
-
End Date / Time - end date and time of the campaign
-
Available - selection when the campaign will be available - Every Day | Selected Days
-
-
Click Save Campaign
After saving the List of Campaigns is displayed, the ID needed for to link the campaign to promotional footers is displayed in the 'Type' column for example [10006804]
Adding Promotional Footer
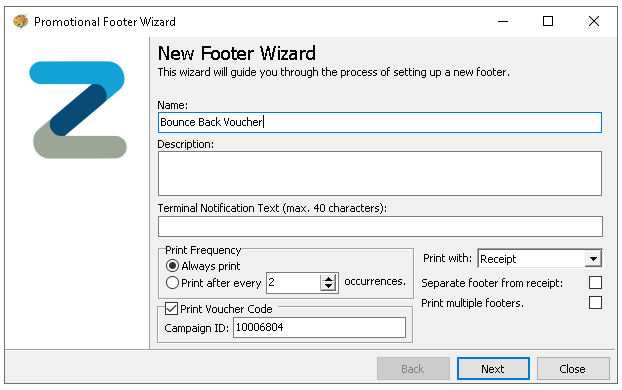
The campaign code created is added during the promotional footer setup in Aztec.
-
Set the check box Print Voucher Code to be enabled
-
Enter the Campaign ID
-
Complete the rest of the promotional footer setup as required
-
On the Text step set the check box Append Voucher Code on the required line for the code to print