Campaigns - Standard
To provide additional control over when and how a voucher code can be used, a campaign can be created. Campaigns support a range of configuration options, allowing administrators to define the validity period of a voucher, along with the maximum number of times it can be redeemed. This makes it possible to tailor voucher behaviour to suit different promotional needs, whether that means a single-use code, a limited-time offer, or a voucher that can be redeemed multiple times over an extended period.
Campaigns - Standard Topics
A standard campaign only needs to be created if you need to use one or many of these advanced functions:
-
Multiple use of a single code
-
Restrict multiple use of a single code a set time frame
-
Restriction by day of week or by time
Adding Campaigns
Follow these steps to add a new standard campaign:
-
Select Promotion Type - Standard
-
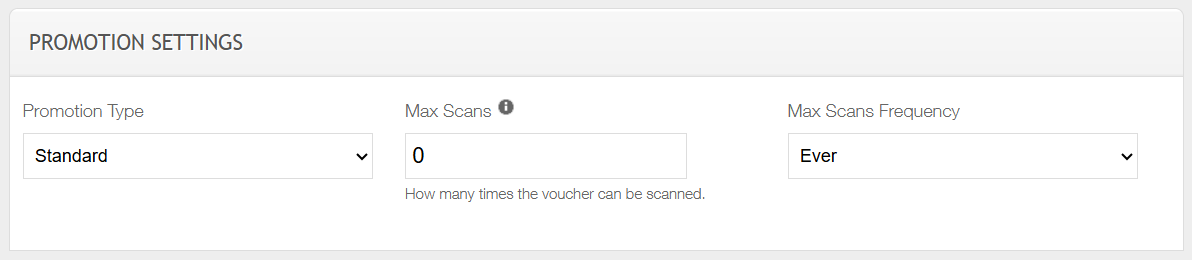
Select and enter the following options from the promotion settings section
-
Max Scans - this is the maximum number of times a code can be redeemed
-
Max Scans Frequency – the time frame that the max scans will be reset - Ever | Day | Week | Month | Quarter
-
-
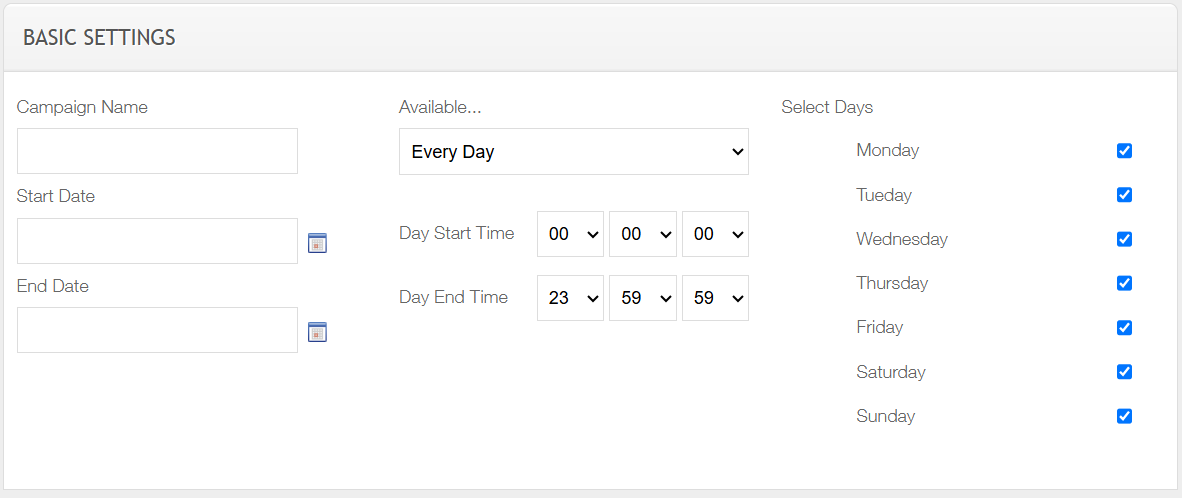
Select and enter the following options from the basic settings section
-
Campaign Name - identifier of the campaign
-
Start Date / Time - start date and time of the campaign
-
End Date / Time - end date and time of the campaign
-
Available - selection when the campaign will be available - Every Day | Selected Days
-
-
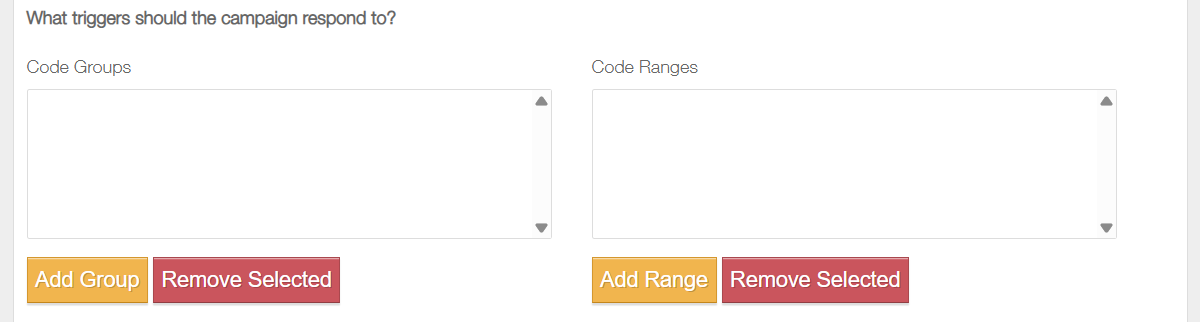
Select the required Code Groups that should be used against this campaign
-
Click Add
-
Select the required Code Group
-
Click Add
-
-
If applicable select the required Code Range that should be used against this campaign
-
Click Add
-
Select the required Code Range
-
Click Add
-
-
Optionally choose to enable Print Settings (defaults to Never)
-
Set the Print drop down to On Checkout
-
Update the Print Content
-
Replace CODE with the required Campaign ID of an existing Bounce Back Campaign
-
-
Click Save Campaign