When an account is created it is assigned a class which contains the primary financial terms that the account can operate with including the maximum allowed credit limit, settlement and statement periods.
Account Classes Topics
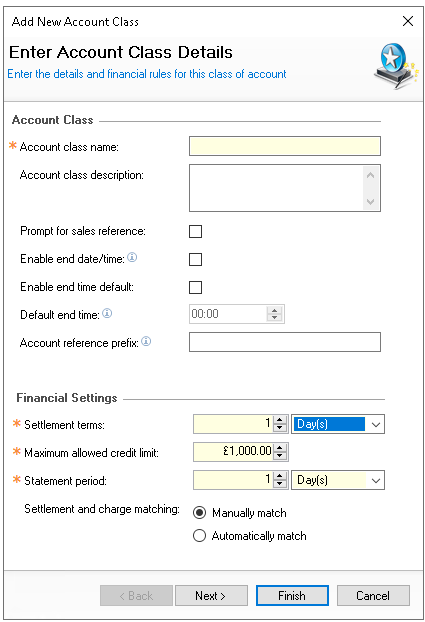
Adding Classes
Follow these steps to add account classes:
-
Click Add
-
Enter the Account Class Name and Description (optional)
-
Set the following additional information
-
Prompt for Sales Reference - when enabled and a charge is made on the point of sale an additional reference will be required
-
Enable End Date / Time - when enabled new accounts require an end date to be set
-
Enable End Time - when enabled new accounts require an end time, charges after the selected date / time combination will not be permitted to the account
-
Default End Time - an end time such as 11:00 could be set which will apply to all accounts created
-
Account Reference Prefix - when creating accounts a prefix could be assigned
Zonal recommends date and time bound account classes for one off events or functions, as they are manually closed once payment has been taken and are no longer required. The end date and time also prevent any further charges being added beyond the specified period
-
-
Set the required financial settings
-
Settlement Terms - a value and selection of days / weeks / months can be made
-
Maximum Allowed Credit - once an account goes over their credit limit charges will not be permitted
-
Statement Period - a value and selection of days / weeks /months can be made
-
-
Set the settlement and charge matching
-
Manually Match - requires during onsite operations to match a settlement to a charge
-
Automatically Match - the system will automatically match settlements to charges
-
-
Click Next
-
Optionally select Automatic Balance Write Offs by selecting the check box and setting the frequency
Setting a balance to write off will automatically set the account balance back to zero, this can be useful for scenarios where data is exported to our to third party system -
Click Finish
Editing Classes
Follow these steps to edit an account class:
-
Select the required Account Class
-
Update any fields as required
-
Click Save
Removing Classes
Follow these step to remove an account class:
-
Select the required Account Class
-
Click Remove
-
Click Yes to confirm the removal
Removal will be prevented if existing accounts are associated to the class, those accounts should be updated to a new class before attempting to remove