Managing Wait Lists
The Wait List tab allows you to effectively manage walk‑in customers, monitor wait times, and allocate tables efficiently - all of which directly impact the customer experience and operational flow of service.
Viewing the Wait List
When viewing the wait list tab, it is important to note that any guest added to the wait list will show, no matter what time of day they are due to arrive - however, reservations i.e., pre-booked guests will only display if due to arrive within the next 2 hour period.
Reviewing the list of guests waiting, includes:
-
Name
-
Party size
-
Time remaining / time waiting
-
Notes (requests, deposits, highchairs, menus)
-
Pager number (if used)
Observe colour indicators for wait times:
-
Orange = 9 minutes remaining
-
Red = 4 minutes remaining
-
Flashing = 0 minutes
Use the sort bar at the top to reorder the list by:
-
Arrival order (#)
Lines will display either a number - which is relative to walk-ins only added to the waitlist, or an "R" which means they are a reservation. -
Name
-
Party size
-
Tables score
-
Notes
-
Time remaining
-
Use Filter to hide or show:
-
No‑shows
-
Cancelled guests
In the bottom of the screen, there is the ability to Select for bulk actions (e.g., SMS, Cancel, No‑Show, Delete) on multiple customers.
Adding to the Wait List
-
Click + icon to create a new booking
-
Enter party size (adults, children, highchairs).
-
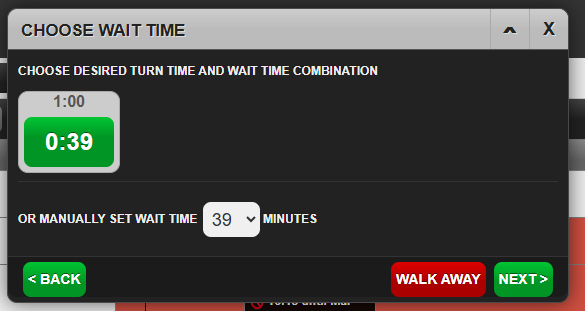
Select the appropriate wait / turn time:
Within this window, your results may vary depending on how busy your site is. The boxes display something like the below:
-
1:00 relates to the turn time. The system will consider how long you usually allocate a guest to a table. In the scenario it requires 1 hour. Should the 1 hour not be available, it may show as 0:47 meaning the guest can have the table for 47 minutes until your next table is due to be seated
-
0:39 relates to the length of time until the next table is to become available. If this shows 0:00 then a table is available now
-
The drop down option allows you to override the above option and select your desired wait time
-
Press Next
-
Enter guest details
-
Phone number (recommended if sending SMS updates)
-
Add any of the following as required:
-
Booking notes
-
Customer notes
-
Company name
-
Review details and select Add to Waitlist
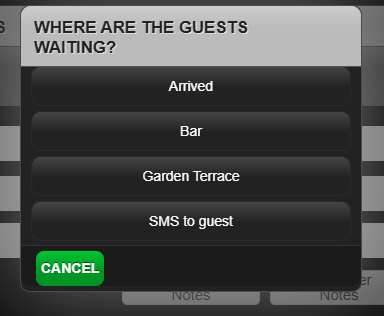
If your venue uses designated waiting areas, select the location where the customer will wait.
Seating Customer from the Wait List
The below steps outline how to use the Wait List screen for seating guests
-
Select the green checkmark next to the customer’s name
-
Select Seat
-
If a table is assigned, and available the guest will be seated and removed from the Wait Llist screen
-
If a table is not assigned, a prompt will display with available tables to be selected from. Once selected, the guest will be seated and removed from the Wait List screen
-
If the customer has paid a deposit: Choose Seat & Redeem OR Seat without Redeeming
-
-
The customer is now moved to the Seated listand visible on the Tables Planning tab