Staff Messages
Sending messages to the team through the point of sale is a useful way to communicate. Messages can be triggered at different times and targeted to specific job roles, giving you flexibility over who receives them and when.
This page explains how to add and manage these messages. To use this feature, the POS integration plugin must be installed.
Staff Messages Topics
Adding Messages
Follow these steps to add messages:
-
Click Add
-
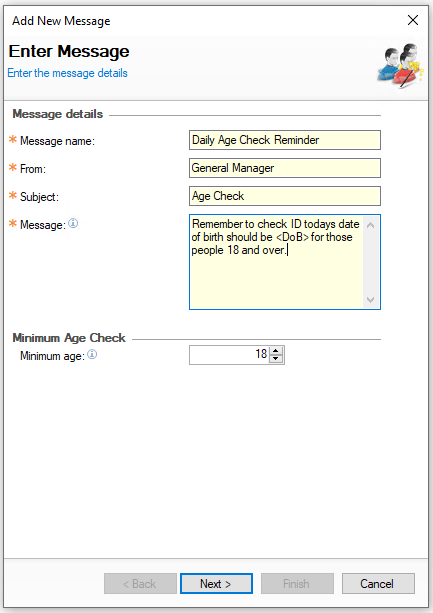
Enter the following details Message Name | From (auto populates to the user logged in) | Subject | Message
-
Optionally set a Minimum Age Check
This function can be useful if you want to have a message that prompts the correct date based on the age entered
For example, if you set the age to 18 and today’s date is 4 November 2025, the corresponding date of birth will be shown as 4 November 2007
-
Set the Age
-
Right Click into the Message to Insert the <DOB> field
-
-
Click Next
-
Configure the required Message Settings
-
Display Action - set when the message is displayed on the point of sale
-
Clock In - when the POS operator clocks in
-
Clock Out - when the POS operator clocks out
-
Identify - when the POS operator identifies (logs in) to the terminal
-
First Identify of Day - when the POS operator identifies (logs in) to the terminal for the first time on the day
-
-
Display Interval - how often the message should show
-
One Off - displays the message once on the given action
-
Repeating - repeats the message on each action
-
-
Start - set the start date of the message
-
Set Message End Date - enable this setting and apply and end date of when the message should no longer show

-
-
Click Next
-
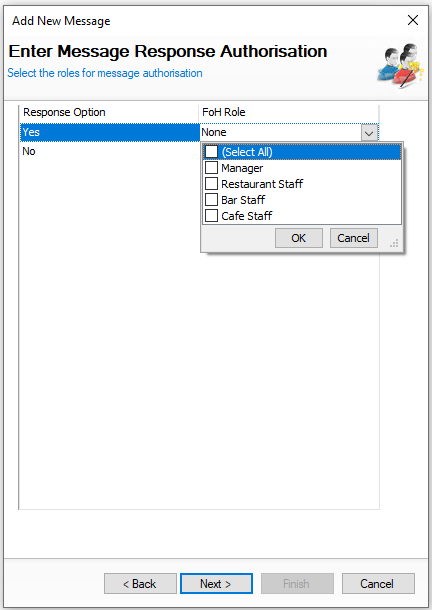
Optionally set the required Message Authorisation
When a message is shown to the operator, Yes and No buttons appear and a selection must be made before continuing. If either button requires authorisation before proceeding, this can be configured
From the drop down select the required front of house roles that can authorise either Yes or No
-
Click Next
-
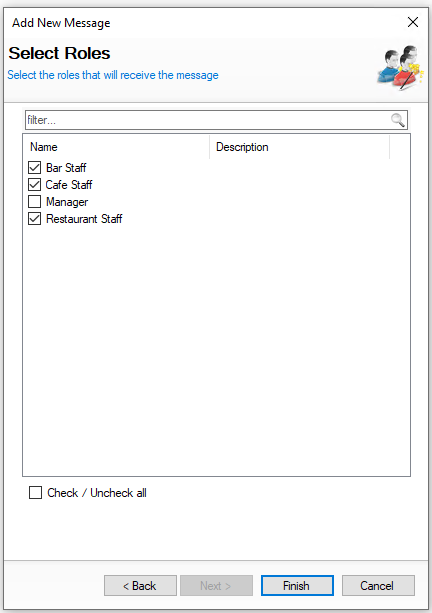
Select the required Roles who will receive the message
-
Click Finish
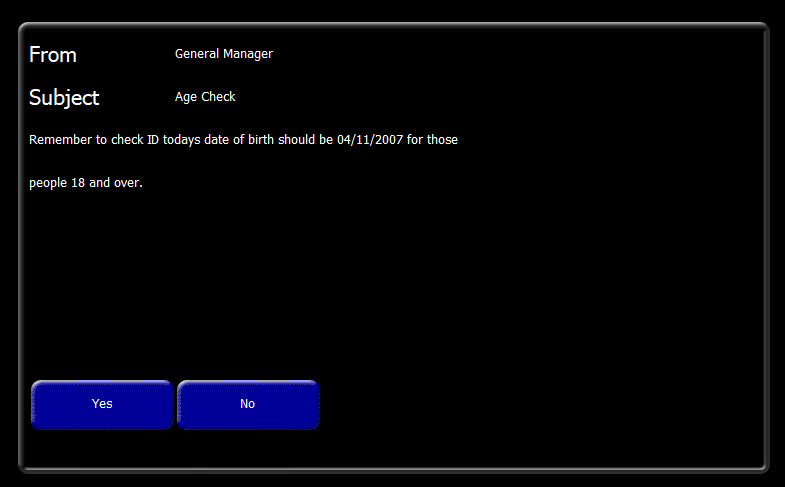
The message will automatically display on the point of sale terminal based on the settings configured
Editing Messages
When a message has been created it can be edited and updated with changed information as required.
Follow these steps to edit a message:
-
From the Message List make a selection
-
Update any fields as required
-
Click Save
Discontinuing / Reintroducing Messages
If messages are no longer required they can be discontinued which keeps the message list updated.
Follow these steps to discontinue a message:
-
Select the required Message
-
Click Discontinue
-
Click Yes to confirm discontinuing of the message
Messages can be reintroduced back after being discontinued
-
Select the check box for Show Discontinued Items
-
Select the required discontinued message
Discontinued portions are displayed in grey -
Click Reintroduce
-
Click Yes to confirm the reintroducing of the message
Reporting Messages
Each message displayed on the point of sale and answered with Yes or No can be tracked and reviewed through the reporting module (Dimensions).
Follow these steps to view message responses:
-
Select the Employee → Staff Messages folder and open the Staff Messages Report
-
Select the required Date Option
-
Click View Report | all message responses will be displayed
