Preparing for Pre-Orders: Your 7 Step Guide
1. Setting up your booking rules
To help avoid extra work later, booking rules can be setup in advance, even before your menus are signed off.
Once the final details are agreed (and tested) and with your booking rules in place, you can trigger email notifications to your guests giving them the ability to place their pre-orders.
Three example scenarios to help you setup your rules
![]()
You are taking bookings without any rules / requirements. There are no booking rules defined, but you want to take pre-orders
-
Create the new booking rule
-
Edit each existing booking manually to apply the new rule
-
Any new bookings made after you enable the booking rule will be automatically subject to the new conditions
-
If you haven’t created a rule but want to add an ad-hoc payment to a booking, you can manually add a requirement to the selected booking. To do this, open the booking and edit its requirements
![]()
You already have a booking rule in place requiring deposits, but now you also want to include a pre-order requirement so that all bookings request a pre-order
-
Edit the booking rule
-
Add the action of pre-order with the required time frames
-
When editing a rule, you will be asked you want to trigger a notification to existing bookings on that rule, we recommend selecting Yes
-
Guests will see that a pre-order is due but won't see the menu or be able to order until you open the pre-order for selections
![]()
You have a rule requesting deposit and pre-order in place and now want to require the guests to pre-pay for their items
-
Edit the existing booking rule and add the action
2. Configuring pre-order send
Pre-orders require key configurations defining how and when they are sent to the point of sale terminal
It is important to know what your setup is as this will help onsite operations
Three example setup scenarios for pre-order send
![]()
Send Time: 04:00 to 07:00
-
This is when all pre-orders will be attempted to be sent to the point of sale terminal from 04:00 on the dining date of the booking
-
A window of a few hours allows for retries and high demand of orders
-
After 07:00 on the day any errors will be visible in the Events Host application enabling time to resolve any issues
![]()
Pickup Time: 23:59
-
All pre-orders will be displayed on the point of sale terminal with a pickup time of 23:59
![]()
Delayed Order Send Time: X mins before pickup time
-
Pre-orders will automatically send to the kitchen X minutes before the pickup time set, unless manual intervention is required
-
If there is no manual send for preparation the order will be sent without a table number
-
To prevent orders being sent directly to the kitchen without table numbers we recommend the pickup time is set to 23:59
3. Pre-arrival checks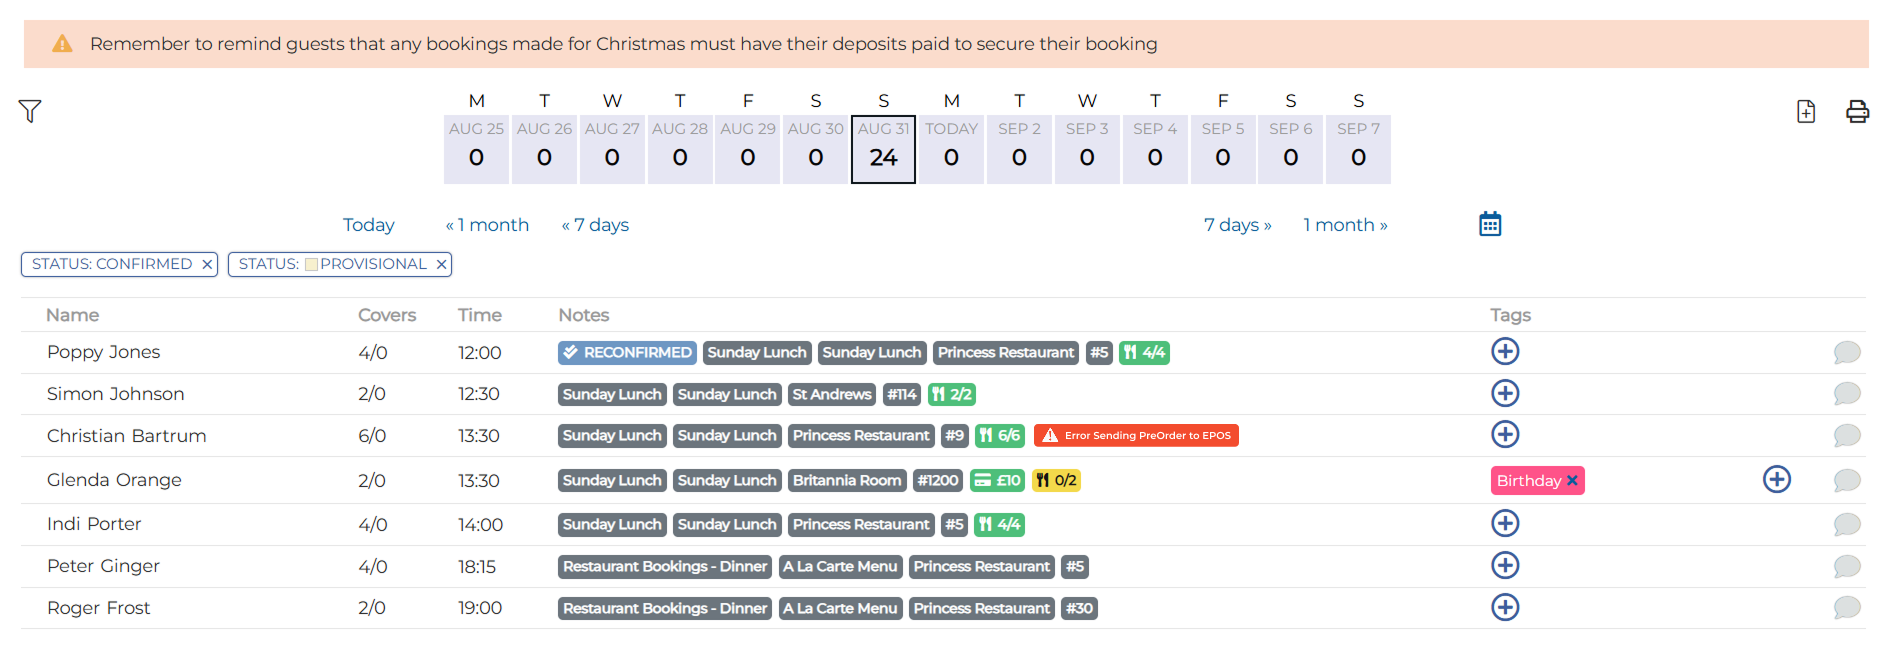
The Day Diary in the Events Host app displays all expected bookings for the current day. If any pre-orders fail to send, an error badge will appear in the notes column.
To troubleshoot, go to Reports and select the Chef Report. Set the start and end dates to the current day. This will display all pre-orders along with the reason for each error. A common example is products being marked as out of stock on the point of sale terminal. To resolve this, return the items to stock and re-send the order from the report.
4. Kitchen team preparations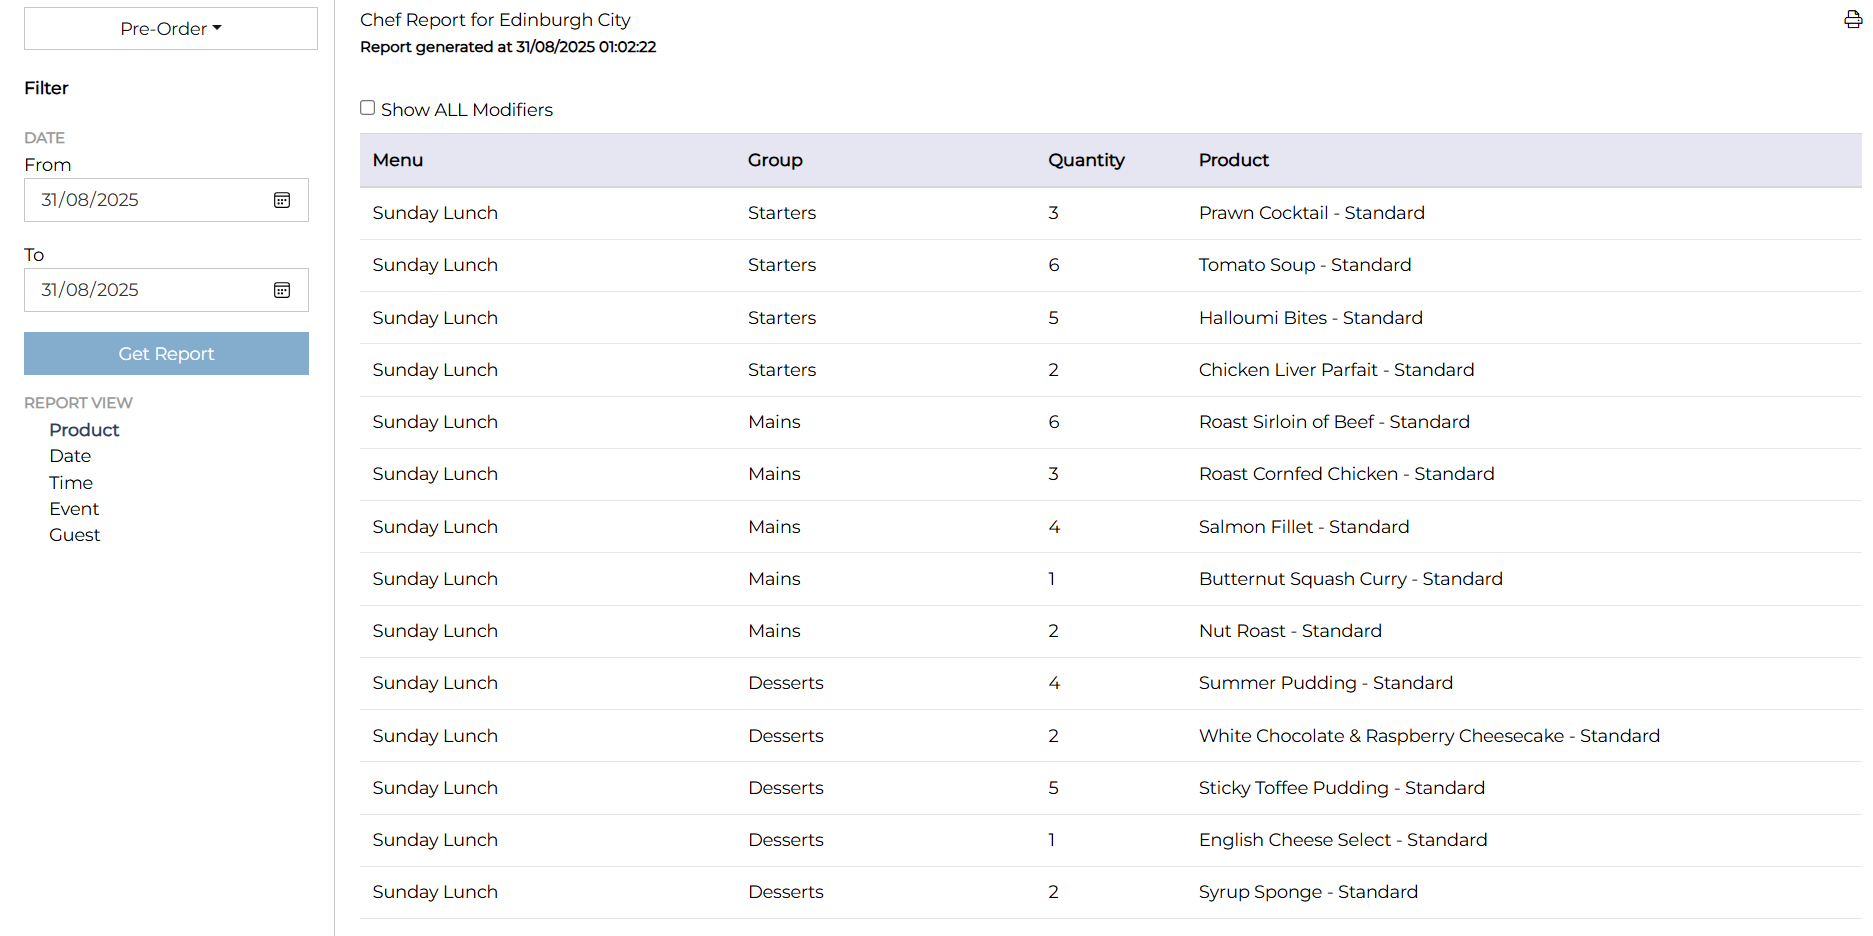
Once all errors have been resolved, you may want to provide the kitchen team with a copy of the chef report so they can prepare large orders in advance. We recommend using the report from the Events Host app, specifically the version that lists the number of items per event. The chef report can then be printed directly from the host application.
5. Point of Sale checks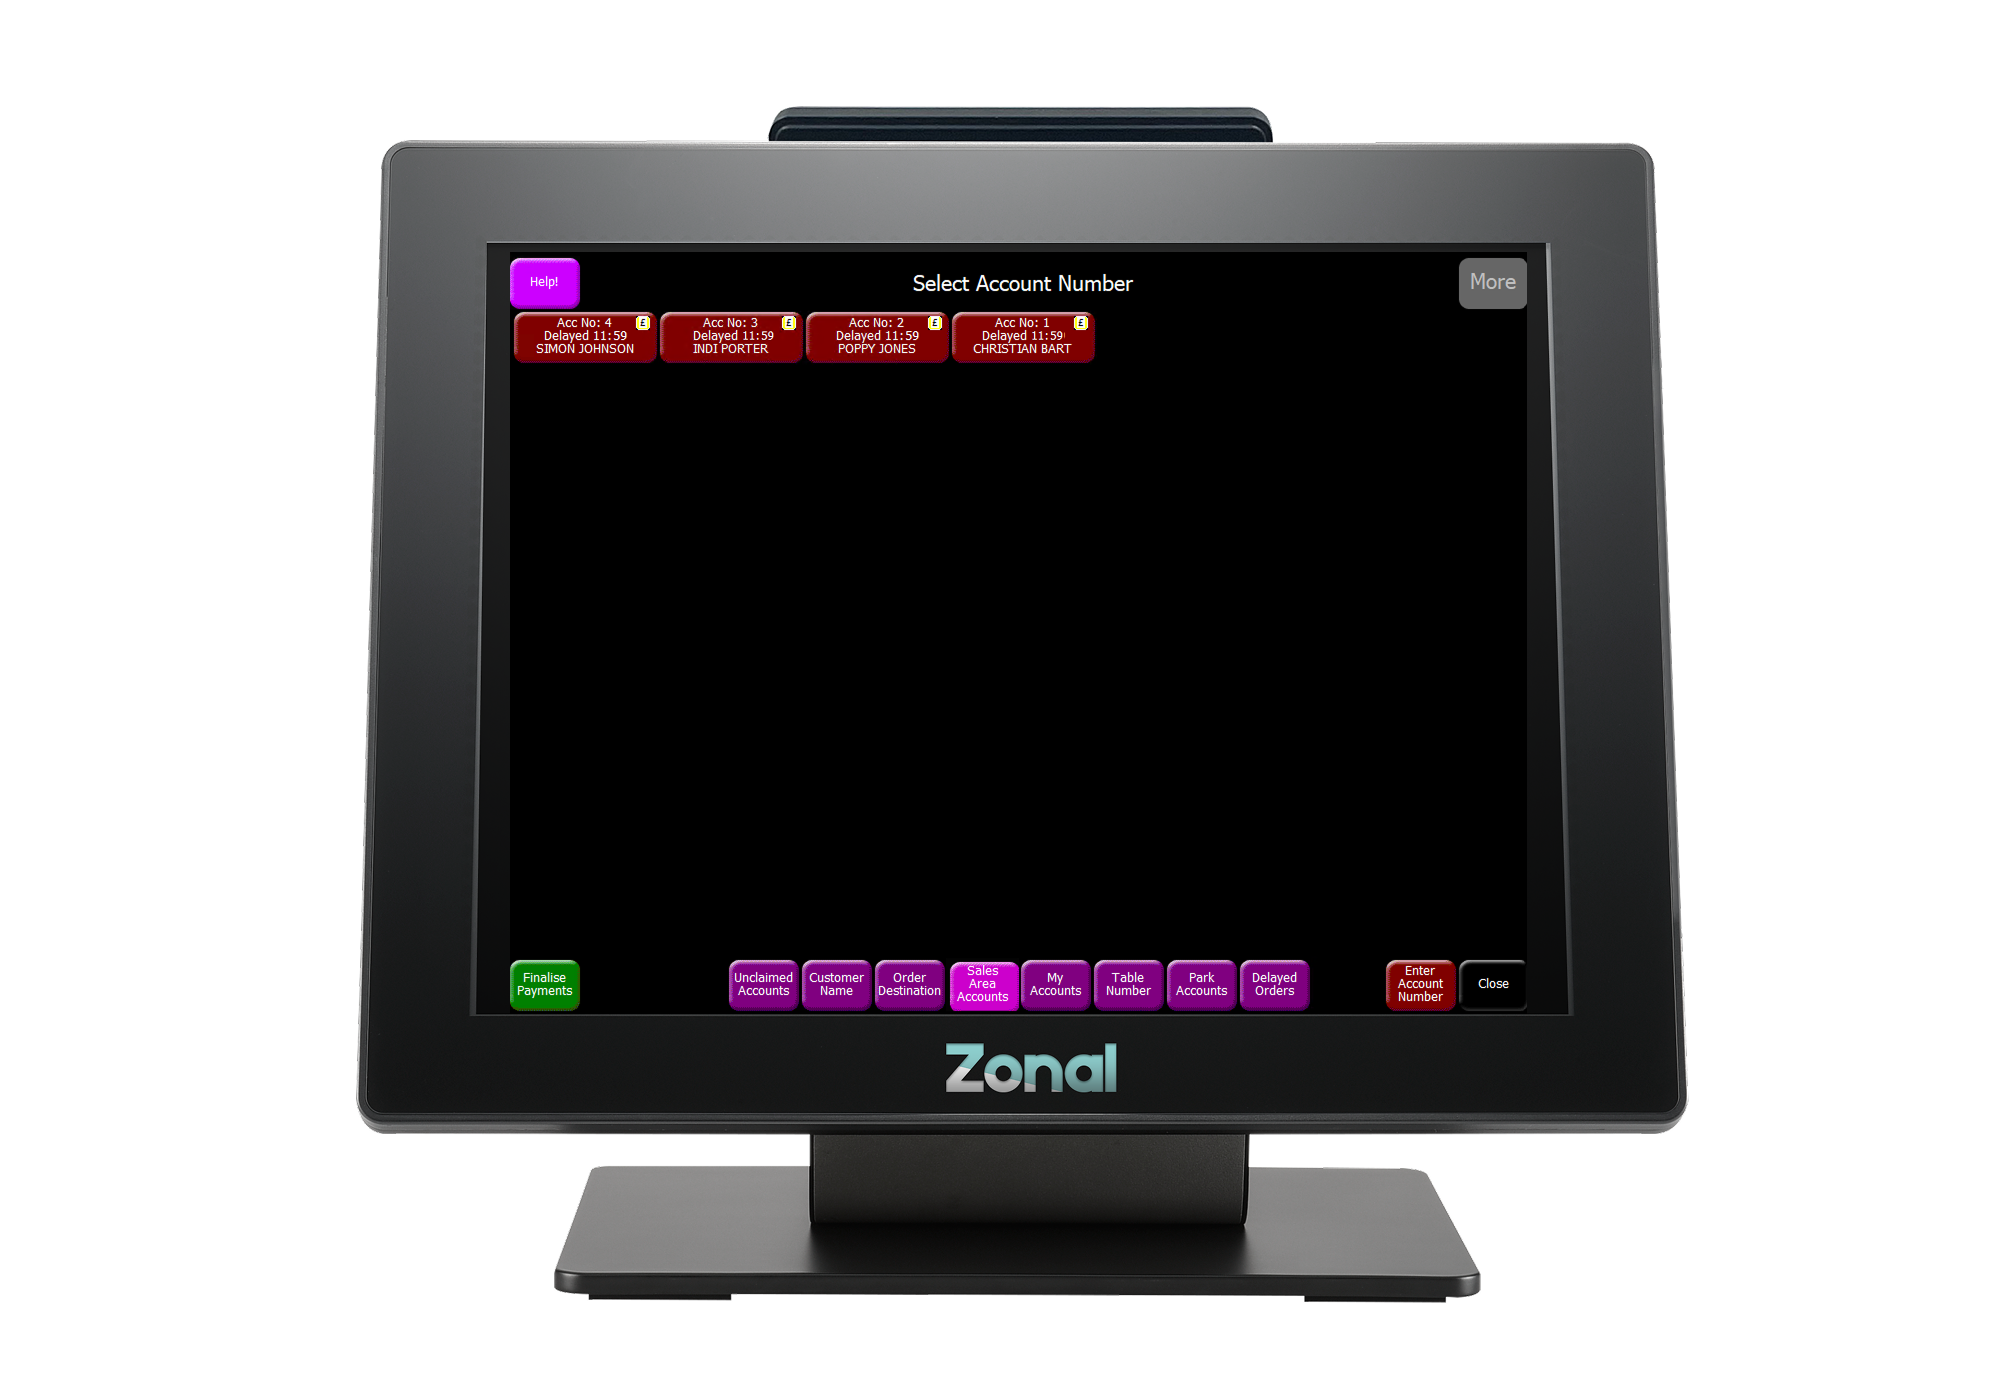
Once a pre-order reaches the point of sale they are stored as delayed orders and can be viewed by
-
Tapping Pickup Account
-
Filtering by tapping Delayed Orders
Check all expected orders for today are displayed
6. Front of House preparation
Run Sheets are part of a 'Central Reservations' feature flag in Events. If you do not see this option within your setup, you may need to speak to your account representative.
This particular feature is really useful for those large bookings. To access the Run Sheet, open the booking on Events Host, scroll towards the bottom and select Generate Run Sheet. Click the desired options and 'Generate'.
7. Guest Arrival
Seating the booking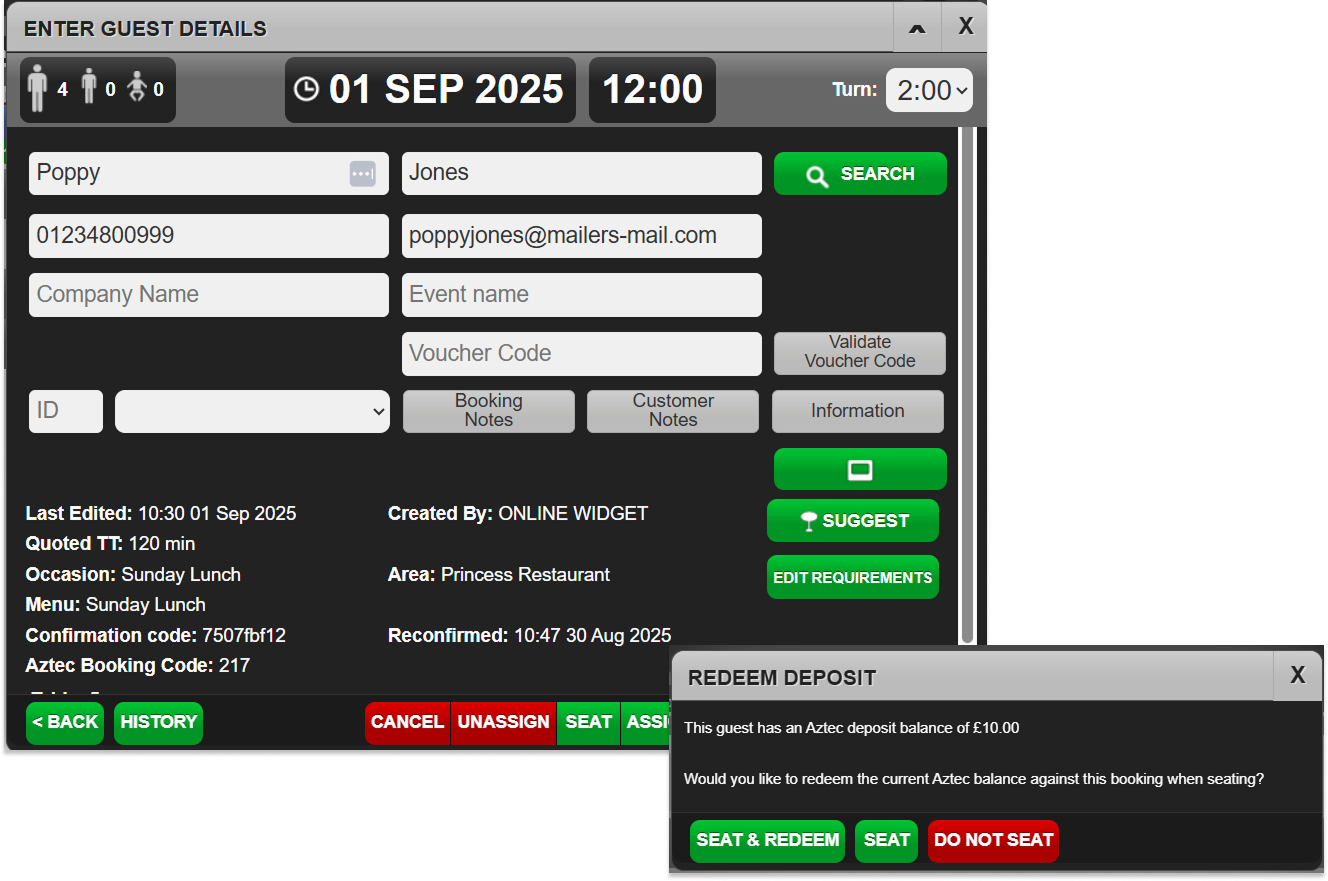
Once the guests arrive, use the Tables Host application to Seat the booking.
If the booking includes a deposit, a Redeem Deposit prompt will appear. Select Seat & Redeem to apply the deposit to the table in point of sale.
If the option does not display, please speak to your account representative who will be able to enable this feature for you.
Check the Pre-Order with the guests
Once all the guests have arrived and are seated, using the chef report or run sheet, users are recommended to confirm all pre-ordered items are correct with the guests.
Add the Pre-Order to the table on POS
-
Tap Pickup Account
-
Select the required Delayed Order Account
-
The Order Preparation Prompt is then displayed asking if you wish to start preparing the order
From Aztec 3.33.0and above select
-
Review Order
or for versions 3.32.0 and below select
-
No
-
-
Select a either an existing open or new Table to move the account to, delayed order items will be set to be on Hold
-
Held items will sent when ready by tapping the Hold Delayed Order button (which will take items off hold) or alternatively selecting to send the order to dispense when picking up the order
-
The course hold feature can also be used to hold specific courses such as desserts until later on during the meal
-
-
Tap Save