Ticketing
Theme Modelling includes additional functionality for printing tickets, which can be used in scenarios such as cloakrooms, door entry, or carvery style dining this page provides details on how to set up ticketing.
Ticketing Topics
Adding Tickets
Follow these steps to add tickets:
-
Click Ticketing
-
Click Add
-
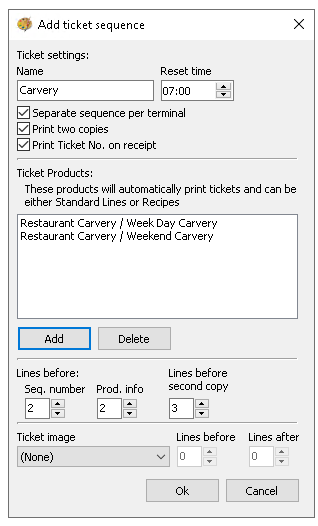
Enter the Ticket Name
The name is printed on the ticket -
Set the following options as required
-
Reset Time - the time ticket numbers reset
-
Separate Sequence Per Terminal - when selected ticket numbers will be separate per terminal
-
Print Ticket No. on Receipt - when selected the ticket number will be printed
-
-
Click Add
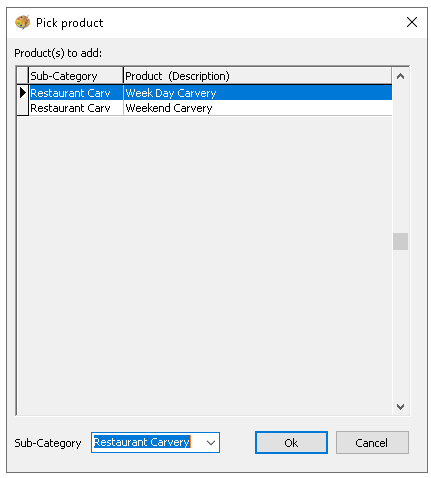
-
From the Pick Product List select the required products that when sold will trigger the ticket to be printed and click OK
Repeat until all products are added
-
Adjust the required Lines Before / Lines Before Second Copy settings depending the organisations requirements
These settings are important when using a cloak room ticket printer and specialist ticket paper rolls which contain pre-punched holes so that the information is printed in the correct place -
If require selected Ticket Image from the drop down | adjust the required Lines Before / Lines After (the image)
-
Click OK
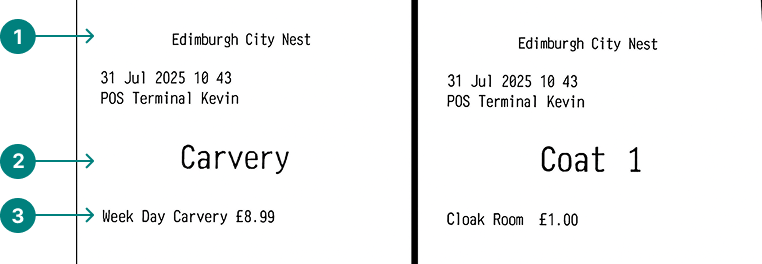
Printed Tickets will display the following:
-
Ticket Header
-
Ticket Name / Ticket Number (as configured)
-
Product Name sold to trigger the ticket print
Ticket Images
Images can be add to be displayed on a printed ticket and are only supported on serial printers.
Follow these steps to add an image:
-
Click Ticketing
-
Click Ticket Images
-
Click Add
-
Enter Image Name
-
Click the ... button and locate the required bmp file image | click Open
Images must be in the following format
-
BMP (bitmap) file type
-
Under 200KB
-
16bit
-
Black and white (this will be turned to monochrome in Aztec)
-
-
Click Rotate
The image must be set in the correct direction for printing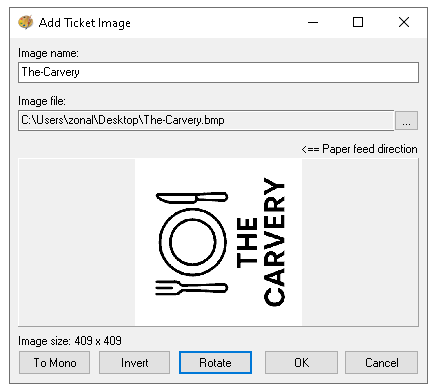
-
Click To Mono
-
Click OK
The image is now ready to be assigned to any tickets
Additional Settings
The following additional settings should be completed for the operation of tickets.
Printing Settings
-
Ticketing Print Group - assign a print stream to this group
Zonal recommends to create a specific 'Ticketing' print stream for this operation -
Ticketing Header - define a header to display at the top of printed tickets
Device Settings
-
If required for cloakroom style tickets add the required printers
Print Groups
-
Set the required print streams for the ticketing print group / printer
Onsite Settings
-
If an image has been added to a ticket images must be sent to printers