The promotions list is shown when the module is opened, providing access to all promotion management activities and settings. This page outlines the available functionality and overall management process.
Promotions List Topics
Promotion List & Actions
List
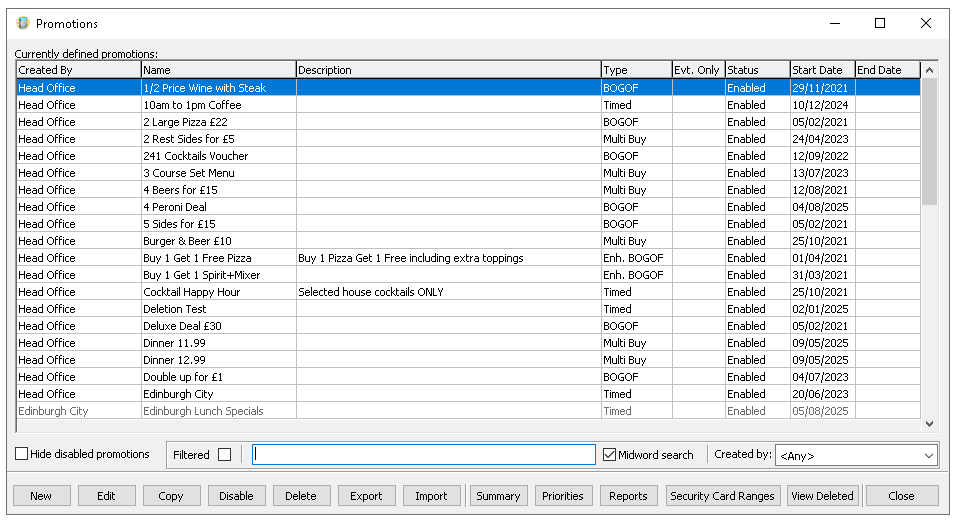
Upon opening the Promotions module, a list of existing promotions is displayed, allowing you to manage current promotions or create new ones, the following information is shown:
-
Created By
Options displayed are either Head Office or the Site Name who created promotions are view only at head office -
Name
-
Description
-
Type
-
Evt Only
Promotions marked for 'Evt Only' are only available during an event, at all other times they are not enabled -
Status
-
Start Date
-
End Date
If no end date set the promotion will run continuously
Primary Actions
The following primary actions can be completed from the promotions list:
-
New
-
Click New to create a new promotion
-
-
Edit
-
Select an Existing Promotion | click Edit to update or change an existing promotion
-
-
Copy
-
Select an Existing Promotion | click Copy and create a new promotion based on the copy
-
-
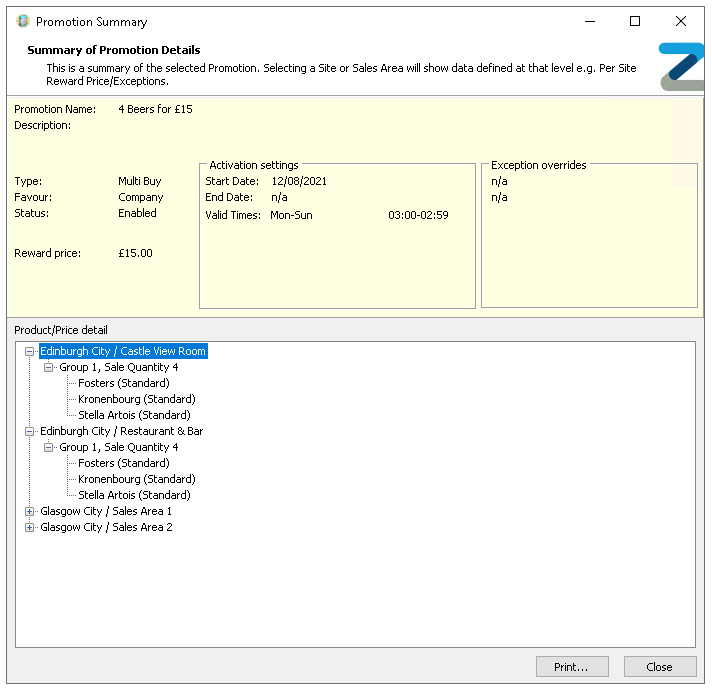
Summary
-
Select an Existing Promotion | click Summary, view only information for the promotion is displayed
-
Searching Promotions
Follow these steps to search for a promotion:
-
Enter the required Search Term
By default, the search uses midword matching across both name and description. If required, you can disable this option to refine your searchZonal recommends selecting the check box 'Hide Disabled Promotions' if you are only search for enabled promotions -
Select the Filtered check box to start the search
-
Deselecting the Filtered check box will refresh the list
Export / Import (Pricing)
When managing price changes within a promotion, the export / import actions provide a convenient alternative to manual editing. This approach saves time and streamlines the update process.
Follow these steps edit prices:
-
Select an existing Promotion from the list
-
Click Export
-
Open Microsoft Excel or equivalent spread sheet and Paste the price information
The exported data will include all groups, sites, sales areas and products added to the promotion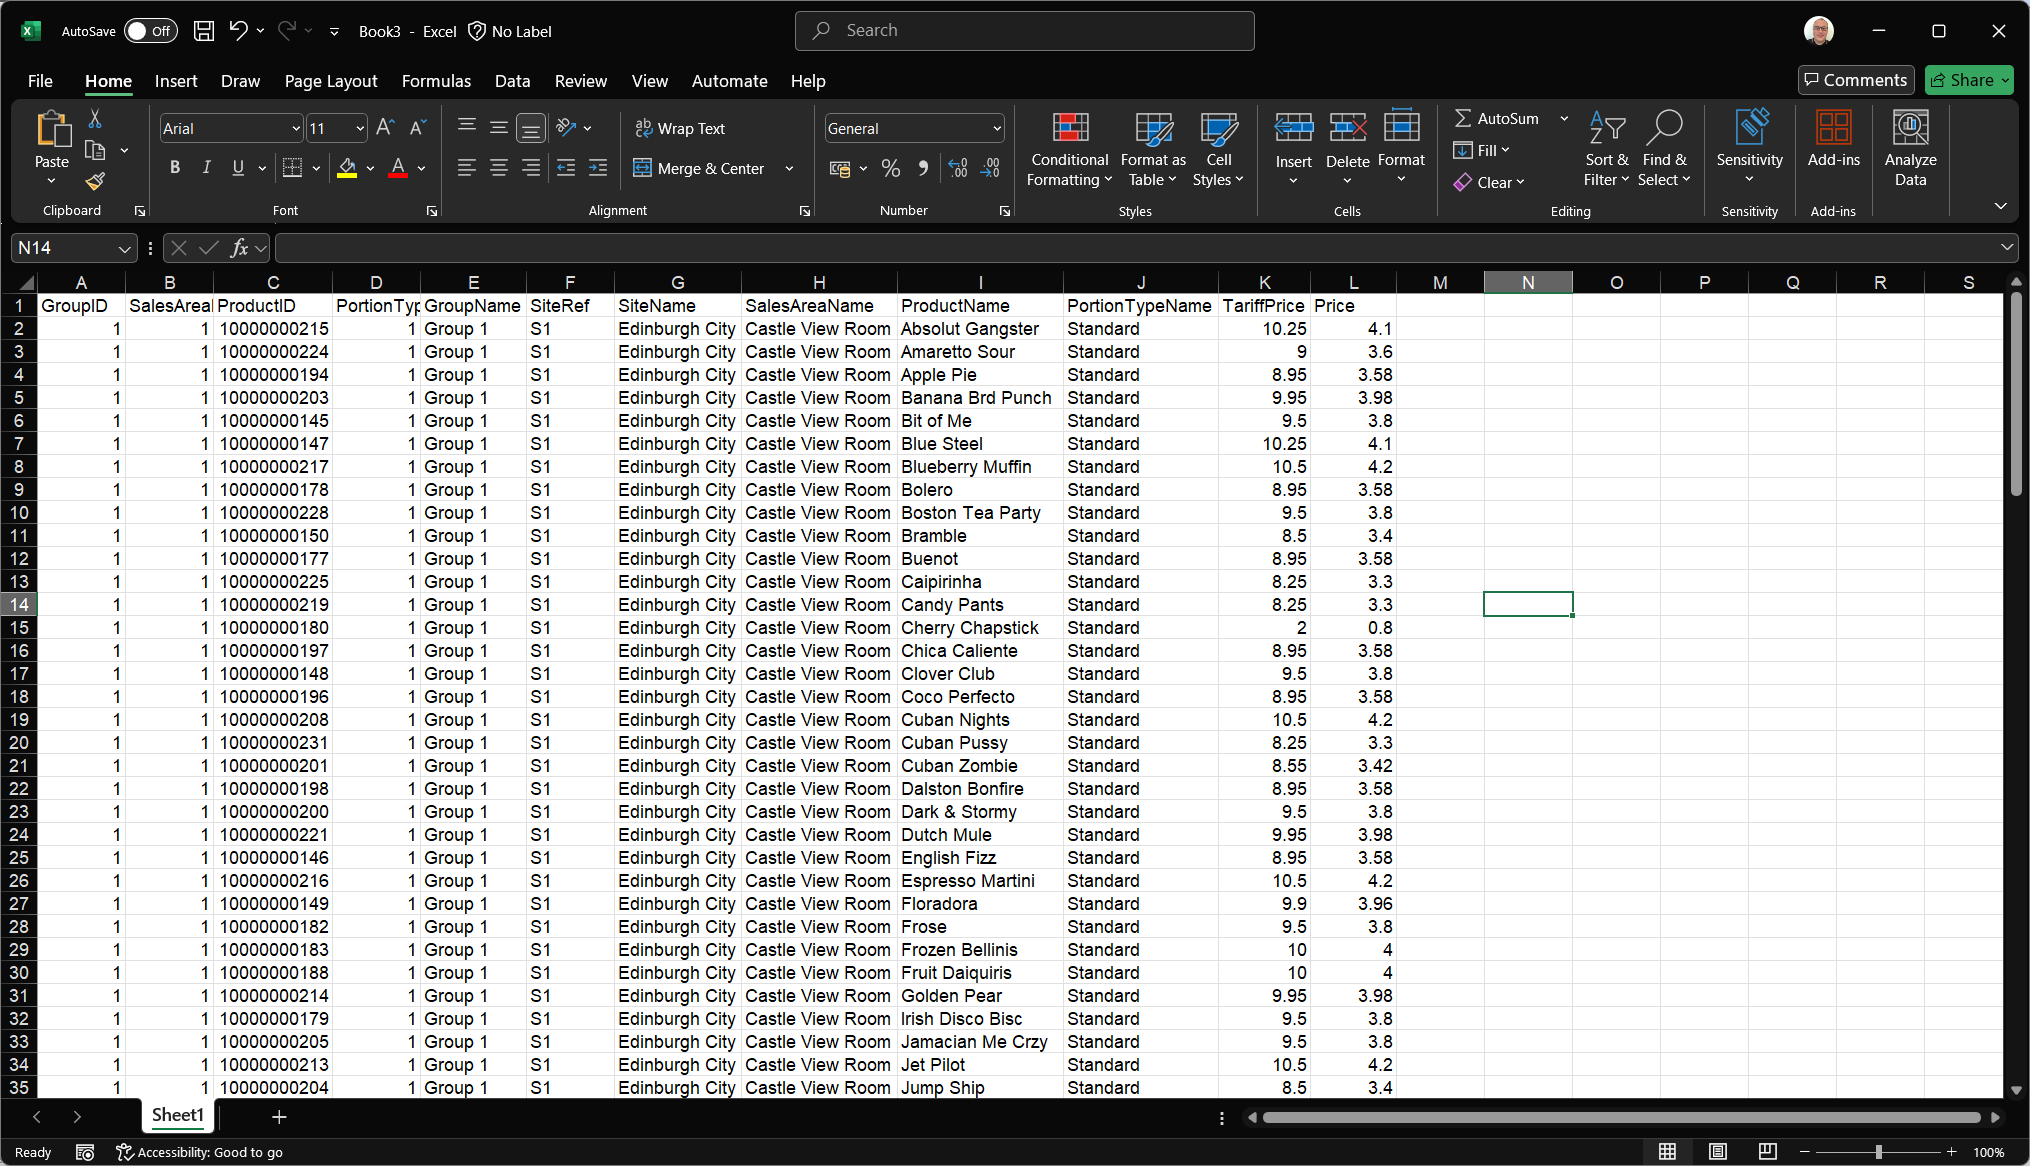
-
Update the prices in the price column (L)as required
Care should be taken not to change any data in the columns A-K as this information is needed when re-importing back to promotions, any changes could cause the import to fail -
Copy all rows and columns of the promotion price data
-
Ensure that the same promotion is still selected in the list, click Import - the prices changes made will be imported
Promotion Status
When promotions are created, they are given an 'Enabled' status, meaning they are active and will trigger when the defined criteria are met. If a promotion needs to be temporarily stopped without being deleted for example, if it may be used again in future changing its status to 'Disabled' is a useful option.
Follow these steps to change a promotion status:
-
Select a Promotion from the list
-
Click Disable
-
To reinstate click Enable
Priorities
In some promotion setups, multiple promotions may include the same products, creating the potential for more than one to be triggered. Since only one promotion can be active at a time, priority rules are applied to determine which promotion takes precedence.
-
Automatic, where the system is set to either
-
Favour Customer - the customer gets the best overall savings
-
Favour Company - the customer gets the least savings and the cheapest items are given within the promotion
-
-
None, where the system is set to enable manual priority assignment and an individual configuration for the bias on each promotion
Additionally it is possible to configure the Automatic vs None mode to selected groups of sites where for example 'sites in Brand A offers Favour Customer' and 'sites in Brand B offers Favour Company'.
Default Template
Follow these settings to manage priorities for the default template:
-
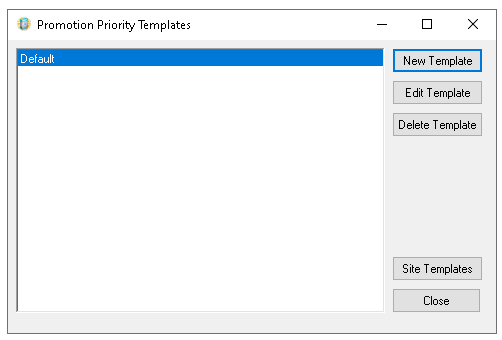
Click Priorities
The promotion priority templates list is displayed
-
Click Edit Template
-
From the Sites List click Next
-
Set the required Automatic Priority Mode for Sites from the drop down with one of the following options
-
None - promotion priorities are manually set based on the list order
Rearrange the order by either dragging and dropping or selecting a promotion and using the up / down arrows
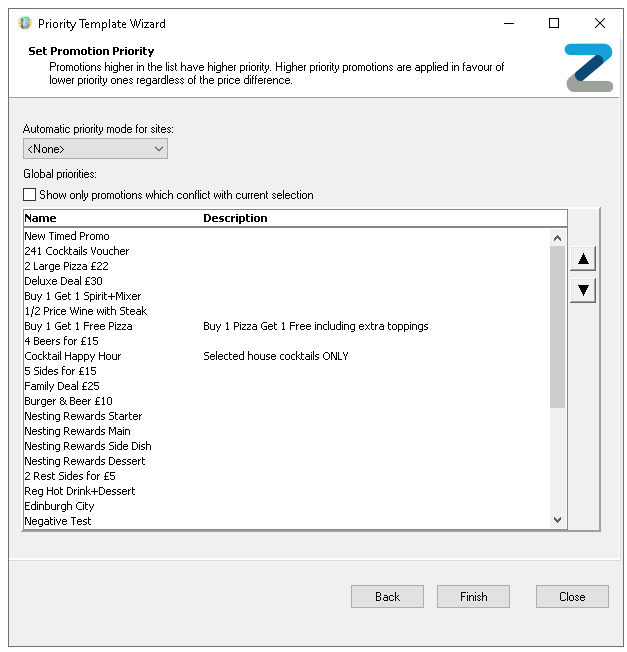 Zonal recommends selecting the setting 'Show only promotions which conflict with current selection' when handling priority settings so that only those promotions with conflicts are displayed and the correct priority can be set
 -
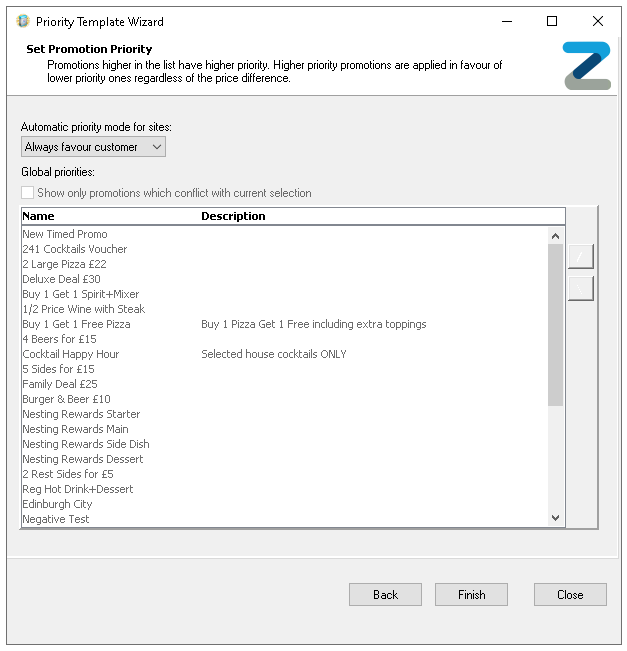
Automatic Favour Customer - the customer will get the best possible selection of promotions with the most amount of savings
-
Automatic Favour Company - the customer will get the least savings of any activated promotions (benefiting the company)
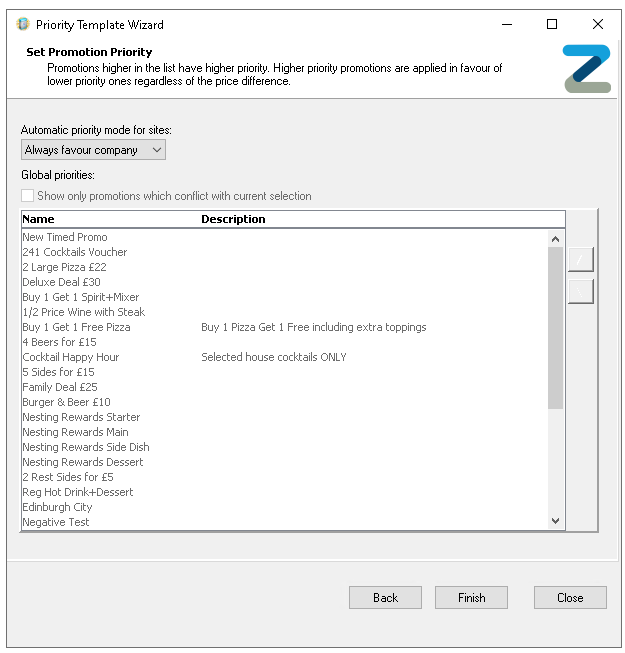 For both customer and company the promotion list will be disabled as the system will handle the automatic prioritisation based on the selected option
-
-
Click Finish
Other Templates & Site Allocation
If different manual or automatic priority settings are needed for other sites, additional templates can be created. Sites can then be assigned to these templates, and their specific priorities configured as required.
-
Click Priorities
-
Click New Template
-
Enter the Template Name
-
Select the required Sites from the Estate Structure which will apply to the template
Expand the estate hierarchy to make selections and use the arrow buttons to add the selected locations or apply search and tag filters -
Click Next
-
Set the required Automatic Priority Mode for Sites
If 'None' is selected manually arrange the promotion order for the required priority -
Click Finish
Site Assignment
Once a template has been created, sites can be reassigned to other templates, this process must be done before any templates can be deleted.
Follow these steps to change site assignment:
-
Click Priorities
-
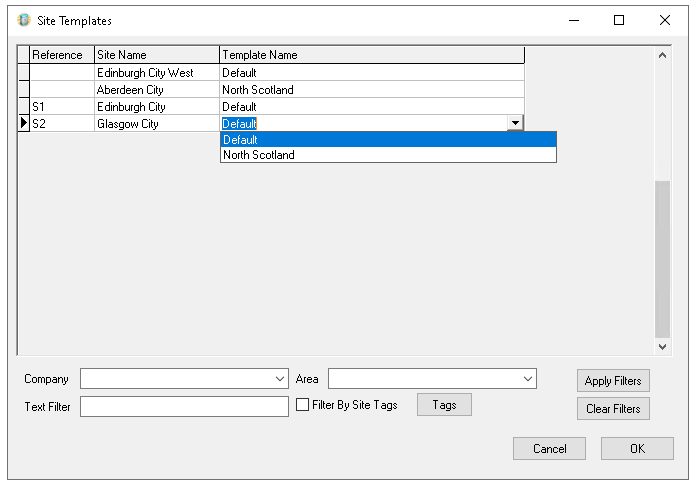
Click Site Templates
-
Set any filters from the selections
-
Company
-
Area
-
Text Filter
-
Tags
Click Apply Filters
-
-
Amend site template assignment as required from the Template Name drop down
-
Click OK
Security Card Ranges
Promotions can be configured to activate when a card is swiped through the point of sale terminal. During setup, a specific card range is assigned to the promotion to control activation.
Follow these steps to manage card ranges and groups:
-
Click Security Card Ranges
From the security card ranges list all numbers and groups can be managed

-
Click Add
-
Enter the Description | Range Start and End card numbers
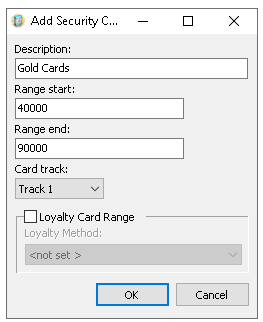 When adding ranges care should be taken to not overlap with existing other ranges
 -
Select the required Card Track
Cards are encoded with the number on track 1 or 2 - for more assistance contact the supplier of the cards -
Click OK
Settings displayed for loyalty card range are now redundant and should not be enabled
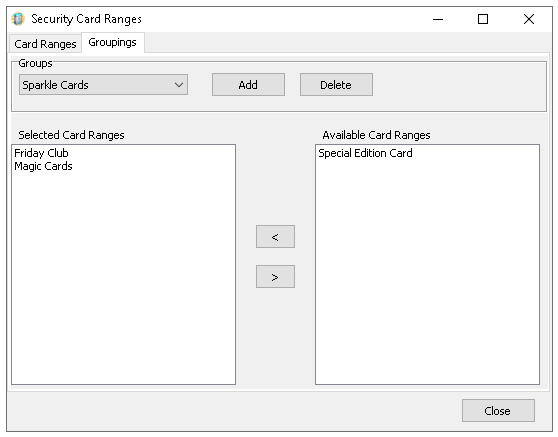
When card ranges are added, they should be assigned to a group. Multiple ranges can be included within the same group, which is then linked to the promotion for activation purposes.
-
Select the Groupings tab
-
Click Add | enter the Group Name, click OK
or select an existing group from the Group drop down
-
New card ranges will be displayed in the right 'Available Card Ranges' section to assign, use the arrow buttons to move the range into the group
-
Click Close
Deleted Promotions
For large organisations where there hundreds of promotions Zonal recommends to implement the automated promotion maintenance feature where after a given number of days retention period promotions (created at both head office and site) will be hard deleted from any promotion database tables.
By default this feature is not enabled and should be turned only where needed.
Enabling Promotion Deletion
Follow these steps to enable promotion deletion:
-
Set the check box for Promotion Details Maintenance to be enabled
-
Set the required number of days
The retention period (in days) is how long a deleted promotion will be archived in the database during which time it is possible to restore the promotion. Out with the retention period any deleted promotion will be permanently deleted from the database
The minimum retention period that can be set is 3 months (90 days) and maximum retention period that can be set is 36 months (1096 days)
-
Open Promotions to run the initial promotion maintenance
During this time there will be a short delay whilst Aztec checks promotions and updates any necessary tables to archive promotions, the progress bar will state 'Looking for Deleted Promotions' and 'Looking for Promotions Archived more than X Days ago...'
When Promotion Details Maintenance has been configured with retention period, the first run of the Promotions module by a user each day where you see the Please Wait messages briefly may take slightly longer than at other times whilst this process of permanently deleting and archiving promotions are carried out
The first comms link to sites post configuration may also take slightly longer due to updates of archiving and deleting of promotion tables
Deleting Promotions / Restoring
Follow these steps to delete and restore promotions:
-
Select an existing Promotion from the list
-
Click Delete
-
Confirm Yes to delete the promotion
The promotion will now be held within the system for the given number of days configured in the retention period -
Click View Deleted, | if there any deleted promotions available to be restored they will be displayed
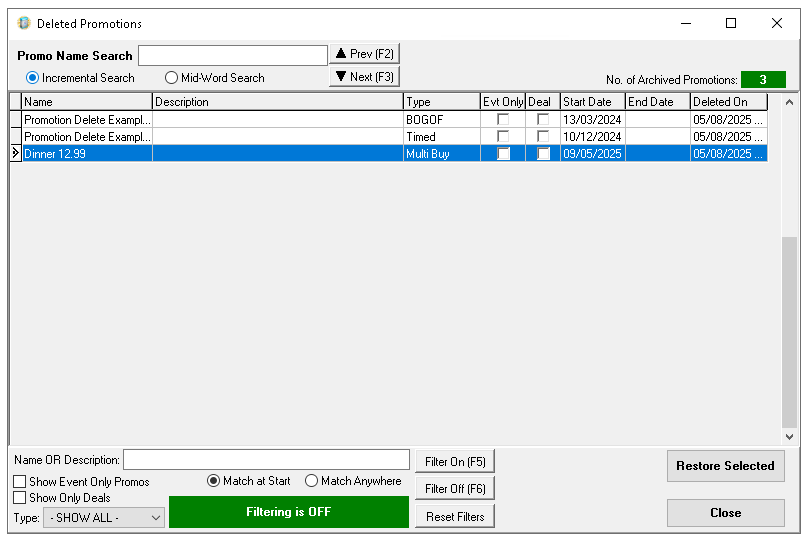 If there are no promotions the view deleted button is inactive
 -
Apply Filters or Search Criteria to locate a promotion to restore | click the promotion row and click Restore Selected
-
From the confirmation screen click OK to proceed or cancel the restore, when complete click OK
On multi-user environments, a user will be alerted if a deleted promotion is restored before another user tried to restore it